I figured out what happened to the pictures; I deleted the muffler pics (before installation) on Photobucket so the links no longer work. My bad! I also erased them out of my phone, so in place of them, I installed a link to the Magnaflow website showing the #12580 muffler and specs. I'll get the hang of it sooner or later!
Mod Blueprint for my 2006 LE
Moderator: volvite
I guess another option for the rear pipe would be for the exhaust shop to make a 2.5" pipe and install an aftermarket resonator, but not sure if there would be clearance issues over the rear suspension.
I figured out what happened to the pictures; I deleted the muffler pics (before installation) on Photobucket so the links no longer work. My bad! I also erased them out of my phone, so in place of them, I installed a link to the Magnaflow website showing the #12580 muffler and specs. I'll get the hang of it sooner or later!
I figured out what happened to the pictures; I deleted the muffler pics (before installation) on Photobucket so the links no longer work. My bad! I also erased them out of my phone, so in place of them, I installed a link to the Magnaflow website showing the #12580 muffler and specs. I'll get the hang of it sooner or later!
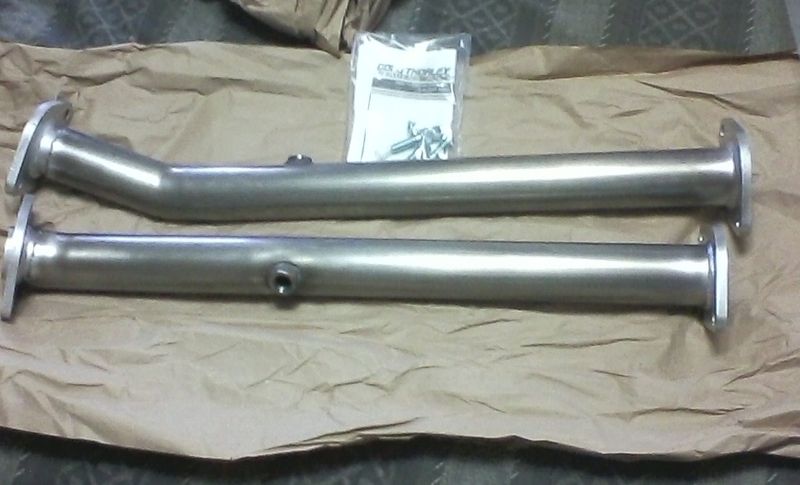
Doug Thorley Mid-pipes
The Doug Thorley mid-pipes, or "B-pipes," showed up today. NOTE: these pipes delete the post catalytic converters and are listed as "race only." Depending on how strict your state's inspection is, having these on your vehicle may cause it to fail inspection. It's considered "tampering with an emission control device." I plan on keeping my post catalytic converters just in case I have any problems next time I'm due for inspection. If you live in California or New York state, I wouldn't even spend the money on them unless you plan on replacing them with your original post-cats before every inspection, assuming you don't use your vehicle solely off-road.
The part is Doug Thorley #83206-B and you can purchase them directly from Doug Thorley's site for $189, which includes $10 shipping. Trying to find them at a better price was tough, as not many places sell them. Interestingly, it was not under the Pathfinder listing that I found them, but under a Frontier. Remember, the post cats are the same on the V6 Pathy, Xterra and Frontier from 2005-2010. I was able to find them at LMPerformance for $169 and free shipping and they shipped directly to me from Doug Thorley. So, that's $20 saved! Here's the link:
http://www.lmperformance.com/572437
The B-pipes ship with some hardware: bolts and nuts for the connection between the back of the mid-pipe to the exhaust Y-pipes, as the factory threaded studs will be eliminated.
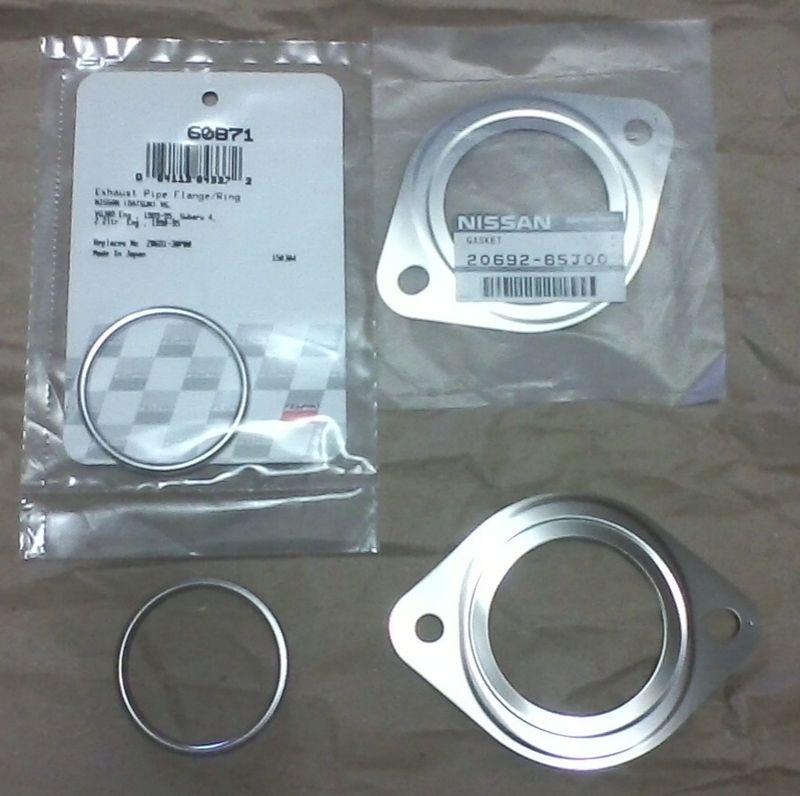
I also purchased new gaskets and nuts. The flange gaskets used at the rear are Nissan #20692-65J00 and I paid $20.74 for a pair of them. The two, self-tightening nuts that thread onto the studs at the back of the front catalytic converter (which connect the front of the mid-pipe to it) are Nissan #20602-41G00; I paid $11 for four of them. Note: there are three more of these same nuts on the front of each, front catalytic converter, so six more will be needed to attach it to the header, assuming hardware doesn't come with the header. The front of the mid-pipes has a metal crush ring gasket. The Nissan part # is 20691-30P00 and I'll eventually need four of them, two for the front of the front catalytic converters and two for the rear. For these, instead of using the genuine Nissan gaskets, I used Fel-pro #60871 which I purchased from Rockauto.com. They are just as good and run a couple of bucks for each.
For now, the mid-pipes are put on the side and will be installed when I put in the headers.
I should also mention that I am using the original rear oxygen sensors. I was going to replace the front oxygen sensors, actually "air/fuel sensors," until I saw the price of around $118 each at Rockauto.com for NTK sensors. I'll wait 'til they go bad at that price!
One more thing to mention, the mid-pipes, just like Doug Thorley's headers and the Magnaflow muffler, carry a limited lifetime warranty.
The part is Doug Thorley #83206-B and you can purchase them directly from Doug Thorley's site for $189, which includes $10 shipping. Trying to find them at a better price was tough, as not many places sell them. Interestingly, it was not under the Pathfinder listing that I found them, but under a Frontier. Remember, the post cats are the same on the V6 Pathy, Xterra and Frontier from 2005-2010. I was able to find them at LMPerformance for $169 and free shipping and they shipped directly to me from Doug Thorley. So, that's $20 saved! Here's the link:
http://www.lmperformance.com/572437
The B-pipes ship with some hardware: bolts and nuts for the connection between the back of the mid-pipe to the exhaust Y-pipes, as the factory threaded studs will be eliminated.
I also purchased new gaskets and nuts. The flange gaskets used at the rear are Nissan #20692-65J00 and I paid $20.74 for a pair of them. The two, self-tightening nuts that thread onto the studs at the back of the front catalytic converter (which connect the front of the mid-pipe to it) are Nissan #20602-41G00; I paid $11 for four of them. Note: there are three more of these same nuts on the front of each, front catalytic converter, so six more will be needed to attach it to the header, assuming hardware doesn't come with the header. The front of the mid-pipes has a metal crush ring gasket. The Nissan part # is 20691-30P00 and I'll eventually need four of them, two for the front of the front catalytic converters and two for the rear. For these, instead of using the genuine Nissan gaskets, I used Fel-pro #60871 which I purchased from Rockauto.com. They are just as good and run a couple of bucks for each.
For now, the mid-pipes are put on the side and will be installed when I put in the headers.


I should also mention that I am using the original rear oxygen sensors. I was going to replace the front oxygen sensors, actually "air/fuel sensors," until I saw the price of around $118 each at Rockauto.com for NTK sensors. I'll wait 'til they go bad at that price!
One more thing to mention, the mid-pipes, just like Doug Thorley's headers and the Magnaflow muffler, carry a limited lifetime warranty.
They use the factory 10MM studs and nuts. The nuts are self-tightening and I got new ones. I don't think them loosening up is going to be an issue. The factory exhaust manifolds are a steel tube design, not large, heavy cast iron units like those used on some cars. The Doug Thorley headers are pretty beefy, I think they are 14 gauge, IIRC. Replacing the secondary cats with straight pipes might make it a little louder, but it shouldn't be too bad.Kestral wrote:I hear header bolts like to back out are you going to use them locking header bolts with the little tab that locks them in?
Do you think they will be loud?
Headers got pushed to Saturday. Have to do some work on a Titan on Friday.
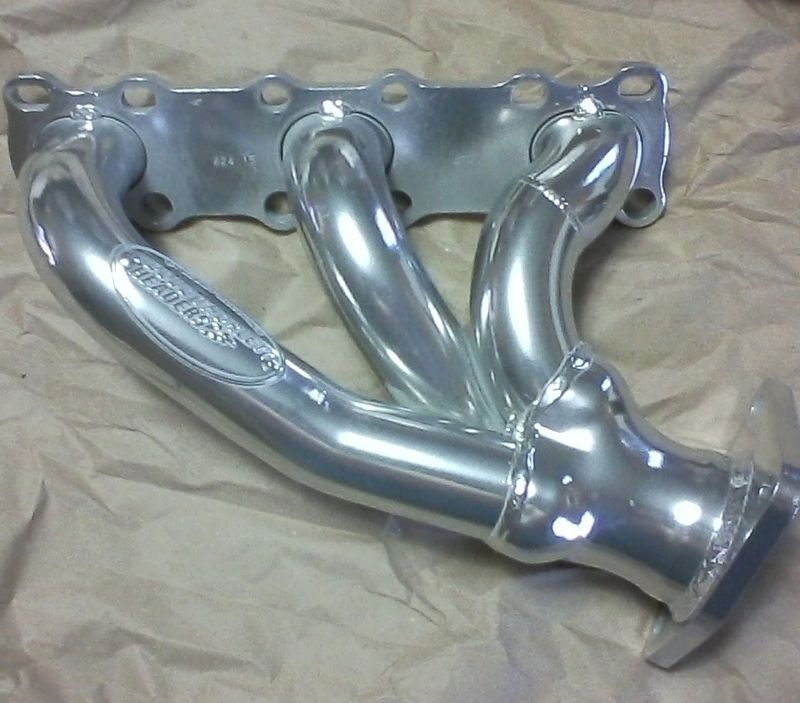
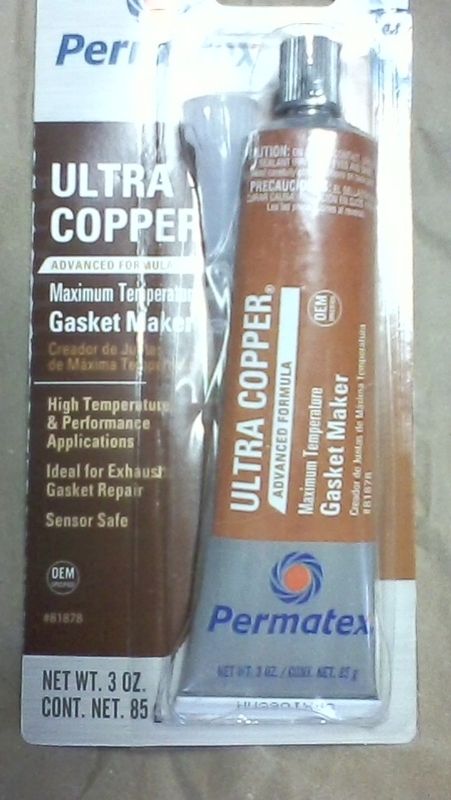
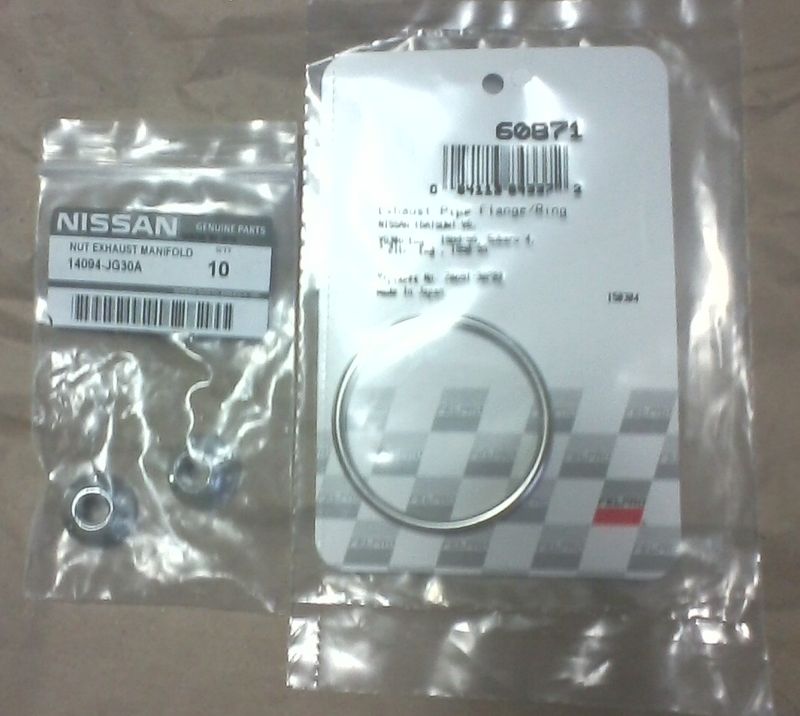
If all goes as planned, tomorrow I'll be installing the headers and B-pipes. The headers are Doug Thorley #THY-470-C and they sell at Doug Thorley's and Summit's site for around $437. After a little searching, I was able to purchase them for $394.39 with free shipping from AutoAccessoriesGarage.com with a 5% discount. They shipped directly from Doug Thorley. Also purchased was a new exhaust manifold gasket set for $9.95+free shipping from Ebay seller Mizumoauto, twelve new exhaust manifold nuts, Nissan P/N 14094-JG30A, from CourtesyParts.com for $9.72+shipping, two Felpro #60871 exhaust gaskets from Rockauto for about $5+shipping and a 3-oz. tube of Permatex Ultra Copper Maximum Temperature RTV SIlicone Gasket Maker #81878 from Advance Auto for $5.25 after discount code. Doug Thorley recommends using the Copper RTV on the manifold gaskets. Since I'll be removing the plastic fenderwells to access the headers, I ordered some extra fender liner clips and screws from CourtesyParts.com. The liner clips, Nissan #63848-D4001, are 90 cents each and the screws, #01451-00841, are $1.13 each. Because they so often break when you try to remove them, I also ordered new push-clips for the fenderwell liner; they are Nissan #01553-09321, but I was able to get a 30-piece bag of them on Ebay for $3.99+free shipping.


Last edited by smj999smj on Fri Nov 27, 2015 7:47 pm, edited 1 time in total.
One thing I should note about the headers: per Doug Thorley, they have a high-Nickel content coating and they will change color and may even get "blackish" in color once they get heated. It is not a show finish, but a protective coating for the headers. They advise not to use header wrap on them and doing so will void the limited lifetime warranty. They state that to install, the right side motor mount will need to be unbolted and the engine raised a couple of inches in order to get the right side manifold/converter assembly out and the header/converter assembly back in. This is not required on the left side. From what I've read, it may not be necessary to raise the engine. I'll find out tomorrow! Torque spec on the manifold nuts is 22 ft./lbs. and there is a specific tightening procedure, like most manifolds. If one if replace exhaust studs, they are torqued to 11 ft./lbs. and they have an inverted torx on the end of them.
Nissan used to have problems with exhaust studs breaking on the VG30 motors; they were 8mm. When the VG33 engines came out, as well as the VQ-series, Nissan got smart and used 10MM exhaust studs. With the 10MM studs, broken studs is a rarity.
I got the headers and B-pipes in, today. Sounds really good (for a V6), but I have to get a weld touched-up due to a small leak and I need to do something with the rear mount; I'll probably cut the original one off of the Post muffler and have a new one welded onto the pipe. The rear exhaust is pushed back a little farther now after the install of the Magnaflow.
Ran into some minor issues, but nothing too major. The left side header was actually pretty east; the right side was a bit of a bear! I didn't need to unbolt the right motor mount and jack up on the engine.
I took a bunch of pics and will post them and give more detail when I get a chance, which will probably be Monday.
Been too busy to post up the pics. I did order up the Stillen #400380 aluminum, standard-size, crank pulley, today. This is the same size as the stock pulley, but removes about 7-pounds of rotating mass off the end of the crank. The VQ40DE is internally balanced, so balance is not an issue. With a 15% holiday discount, free shipping+$9.95 insurance, the total came to $157 direct from Stillen. That was the best price I could find factoring in shipping costs.
Finally with the holidays, I have some time to update this. Since then, I have received the lightweight Stillen crank pulley and Volant air intake system with Powercore filter, but I've yet to install either and will cover them later. For now, back to the header install.
Overall, with a lift and proper tools, this isn't a bad job. It could be done on the ground, but I would imagine it's a whole lot easier in a shop with a lift and air tools as I was fortunate to have at my disposal. The right side engine mount does not need to be unbolted nor does the engine need to be jacked up...IF...you do not need to save the original manifold heat shield. Removal of the right manifold heat shield was one of the hardest parts of the job! Eventually I found that an Ingersoll-Rand air saw came in very handy as I cut it into sections an removed the shield piece by piece. The insulation creates a lot of dust inside the shield, so you may want to wear a dust mask if you are health conscious. Most of the heat shield bolts will break off, which is not a big idea if you have no plans for the original manifolds other than the trash can. Unbolting the brake line bracket on the frame will give a little play in the brake lines and make the job easier. I would recommend new fenderwell clips as they often break trying to get them out; you'll need about 8-10 of them and you can buy them in bags from Ebay really cheap; it's always good to have a few spares! I also lube the new hardware with copper-grease, aka "copperslip." I have a bottle of Loctite C5-A Copper-based anti-seize which works great in this application and many others, including on brake pad hardware. I did have one issue with the headers: the recess in the flange where the exhaust "O" gasket seats is not as deep as the one on the original exhaust manifold. While bolting the headers to the catalytic converters, it crushed the "O" gasket unevenly and even bent the converter flange. When I noticed the gap, I sealed off the manifold and converter and air tested it to find out it was leaking. I took it apart and replaced the new gasket, which was ruined, with the old gasket coated with Ultra-copper RTV. This was on the right side, which has the original converter with 150,000 miles on it; the left side was replaced at 85000 miles. When I did the left side, I used the original gasket with RTV and it did fit better. All was well until several weeks later; currently, I keep triggering a P0420 catalyst efficiency code for the right-front converter. I'm not sure if it's coincidental that the converter is now failing not long after the header install, or if there is a leak at the gasket. I'll have to look into this. I'll also notify Doug Thorley about it.
The left side was the easier of the two sides, which seams odd because of the steering shaft being in the way on the left side. Someone threw me a cookie in that they cut the heat shield when replacing the left converter, which may have made shield removal a little easier. Whereas the right shield had to go through the wheelwell opening, the left shield could be maneuvered up to the top of the engine compartment. With the shields out of the way, it's really not to bad to get to the manifold nuts; the hardest ones are at the front of the manifold. With the B-pipes/post converters removed, the manifold/catalytic converter assy. pulls out through the bottom. Swap over the headers and re-install. Torque the manifold nut to 22 ft/lbs in proper sequence and install the post converters. In my case, I replaced the post converters with the Doug Thorley mid-pipes. Start the engine and let it run for 20 minutes, then re-torque the header nuts to 22 ft/lbs, again. Reassembly and drive! It is a little louder and I would imagine the removal of the post cats have more to do with the noise than the headers. And while I hate using the "butt dyno" reference, it does "feel" like it has better mid-range power. Obviously, without having access to a dyno for comparison, this is only speculation and/or opinion on my part. You will definitely notice a difference in noise level between what I've done (in combination with the Magnaflow muffler) and the stock system, for better or worse, depending on one's point of view. As I mentioned earlier in the thread, if you prefer a nice, fairly quiet Pathfinder as it comes from the factory, you will not want to do this! It is not obnoxious, but it is noticeable, especially from inside the vehicle.
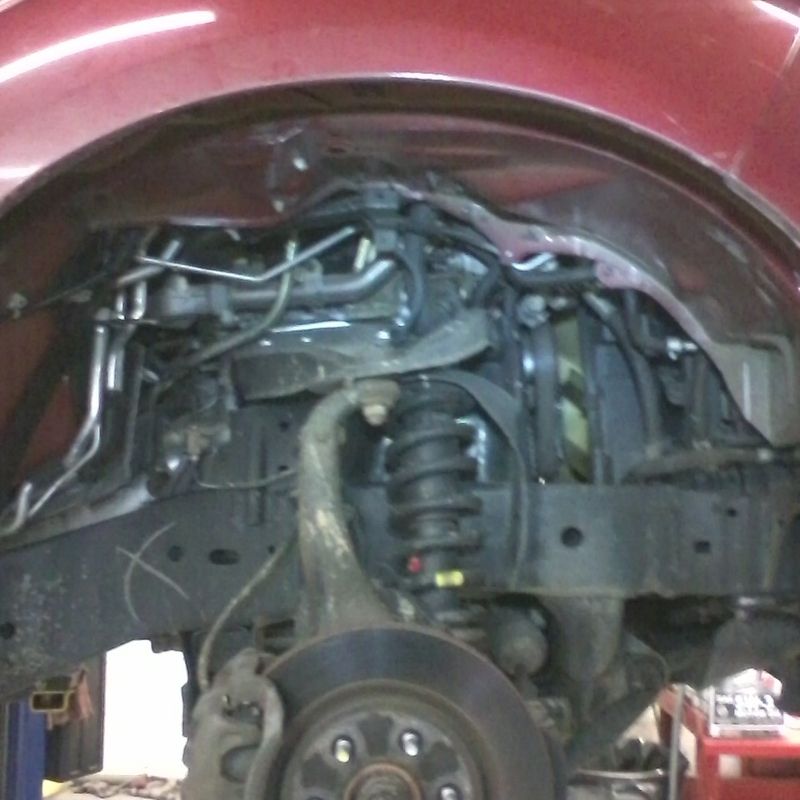
Remove the wheelwell liner:

View with right liner removed:
Remove brake line bracket:

IR air saw worth weight in gold for this job!:

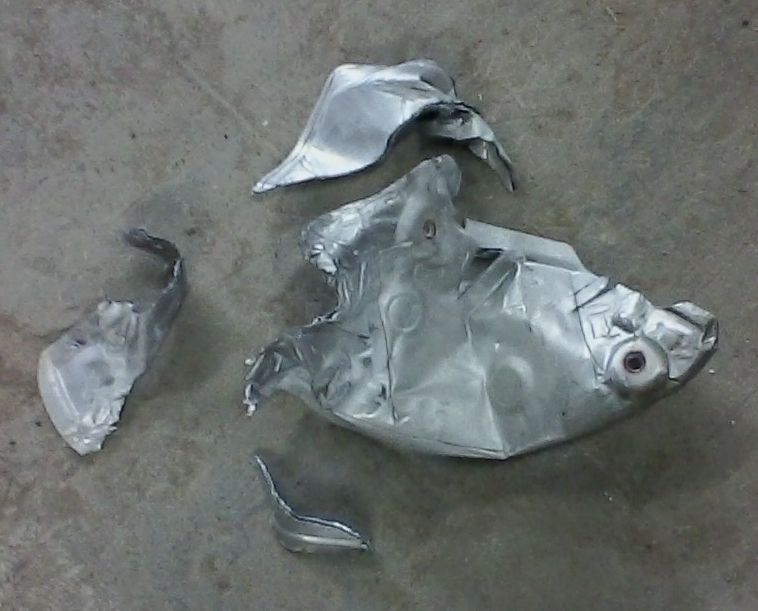
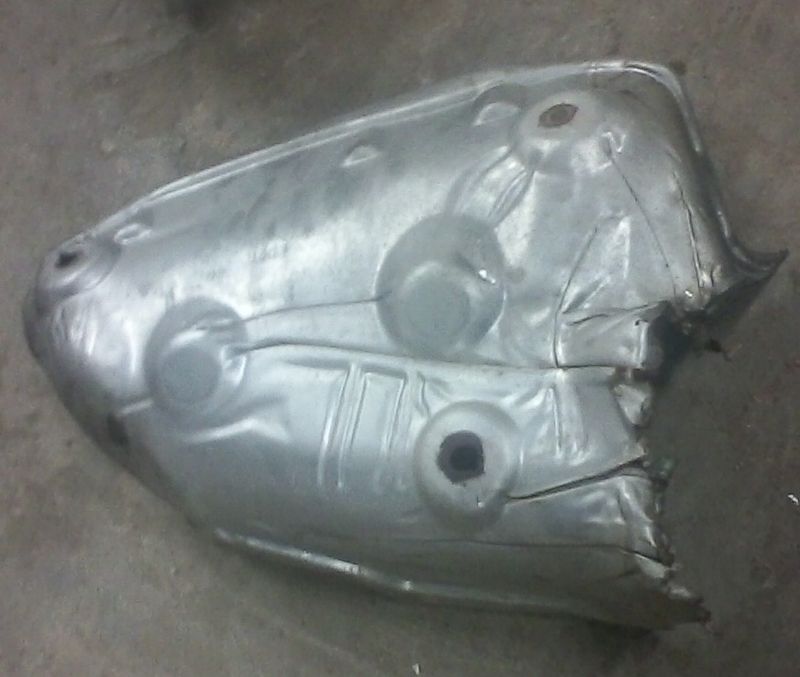
Bend, cut, remove right shield through wheelwell opening:

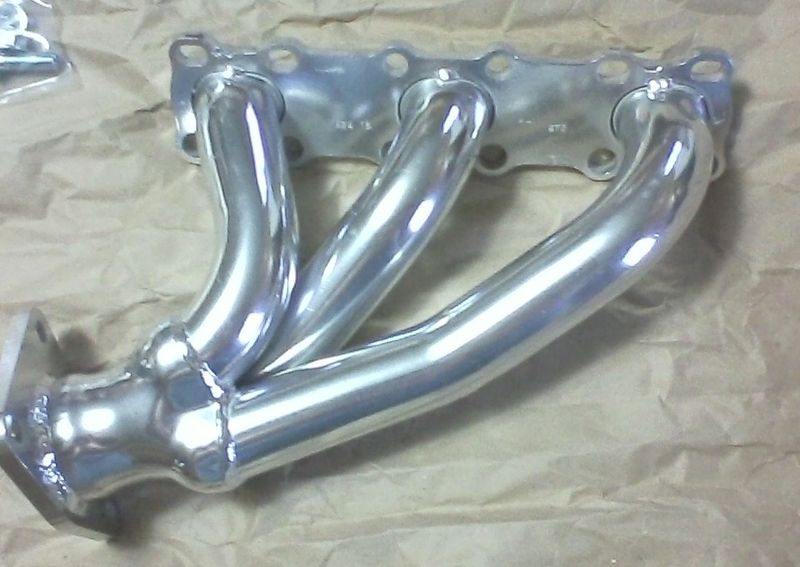
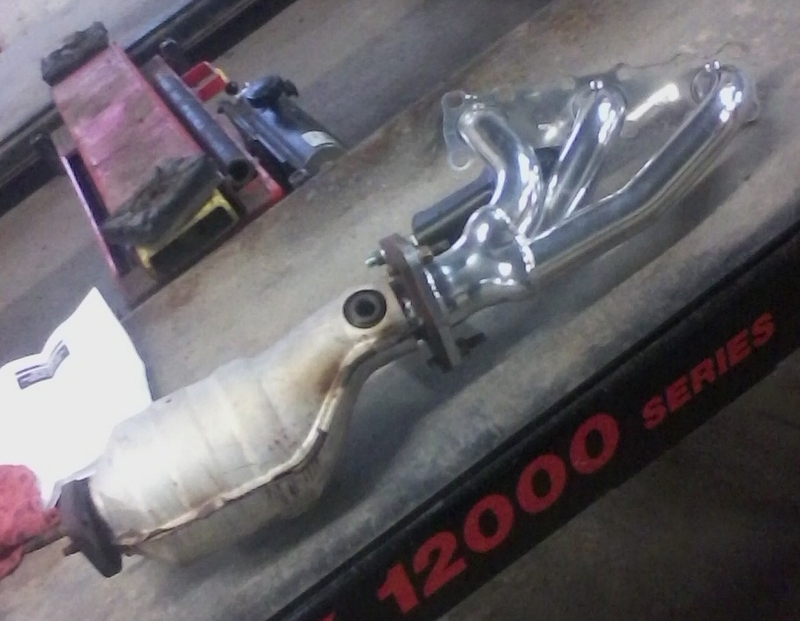
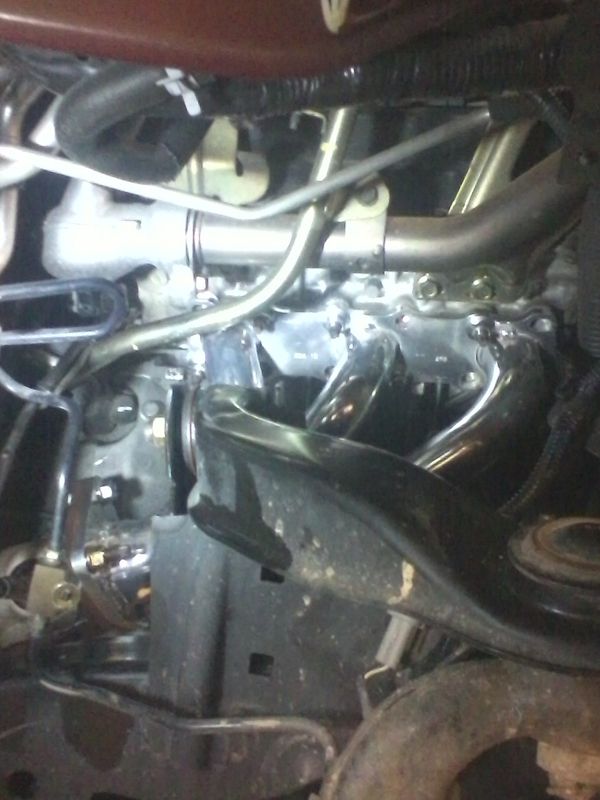
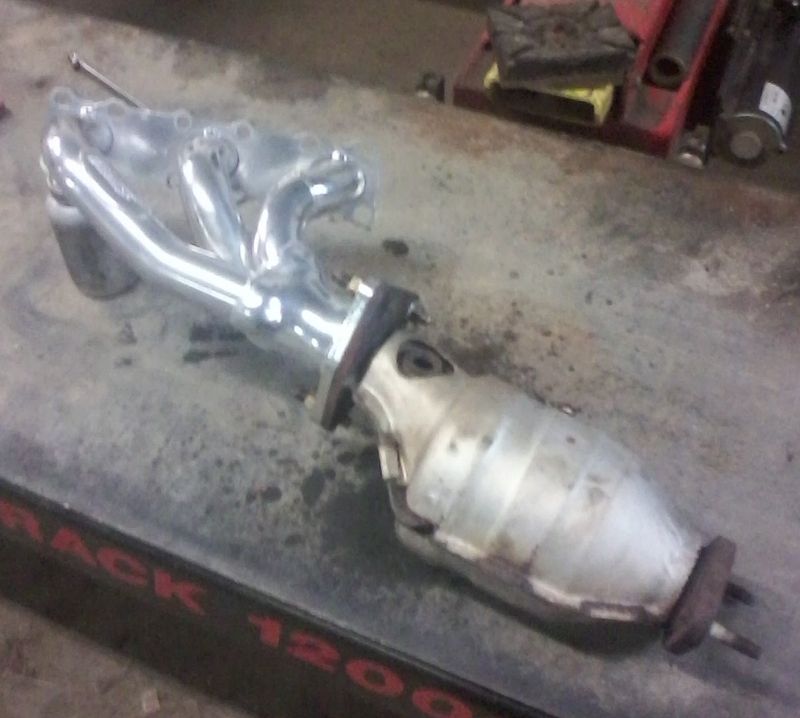
Right header installed:
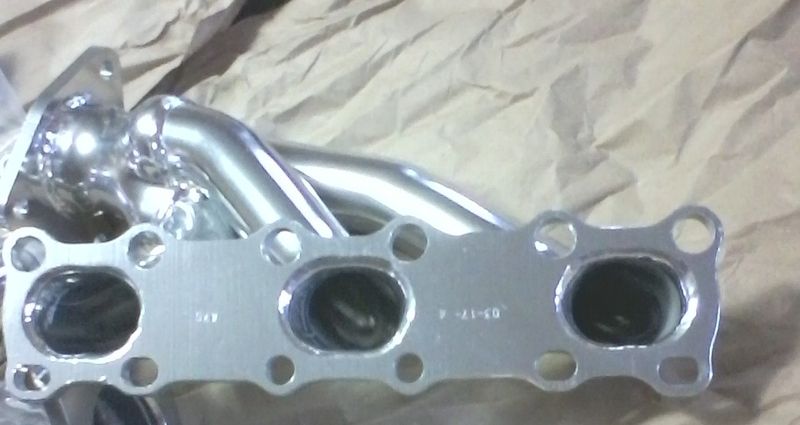
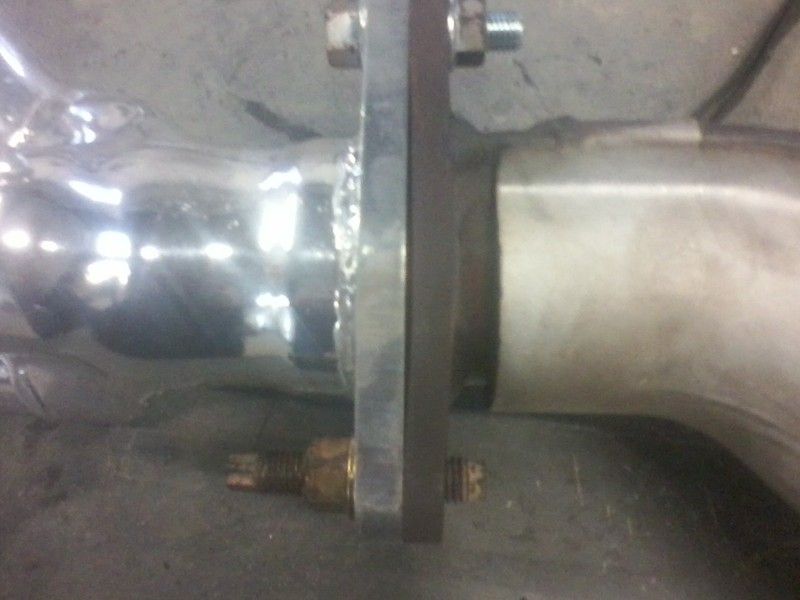
Gap due to poor fit of gasket to new header. Doug Thorley needs to work on this! Maybe an old-style, three-hole, Nissan flange gasket might work better?:


Old gasket used with Ultra-copper RTV:

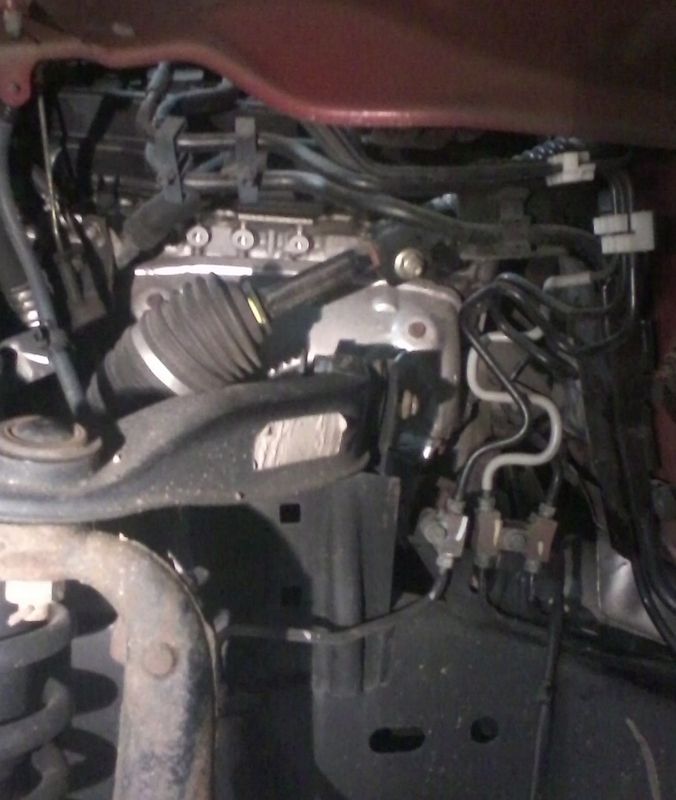
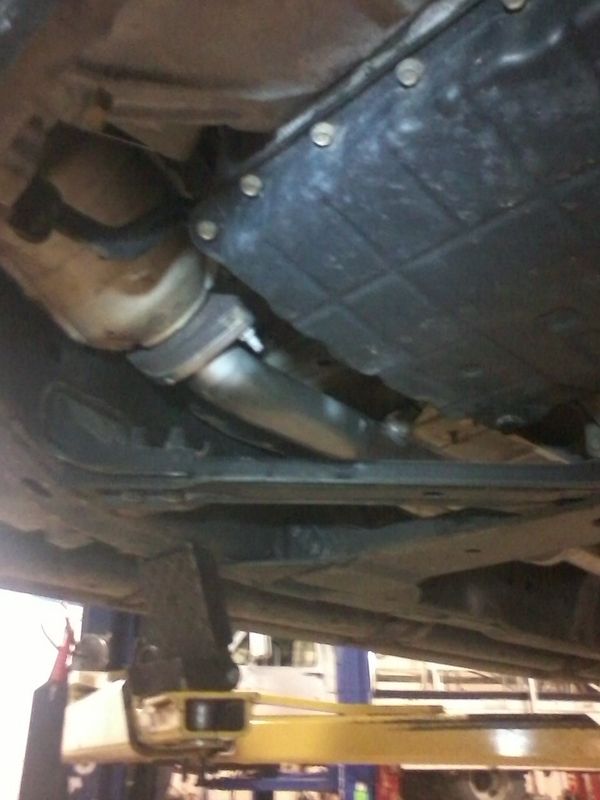
Right side installed:
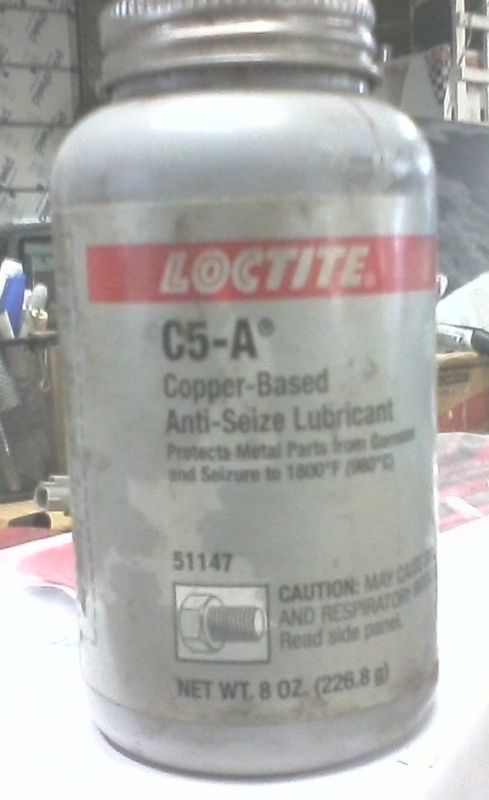
Gaskets, new bolts, Loctite C5-A, Ultra-copper RTV:
Left side with liner removed:
Right shield with a little help from a previous converter replacement:
Left side header installed:
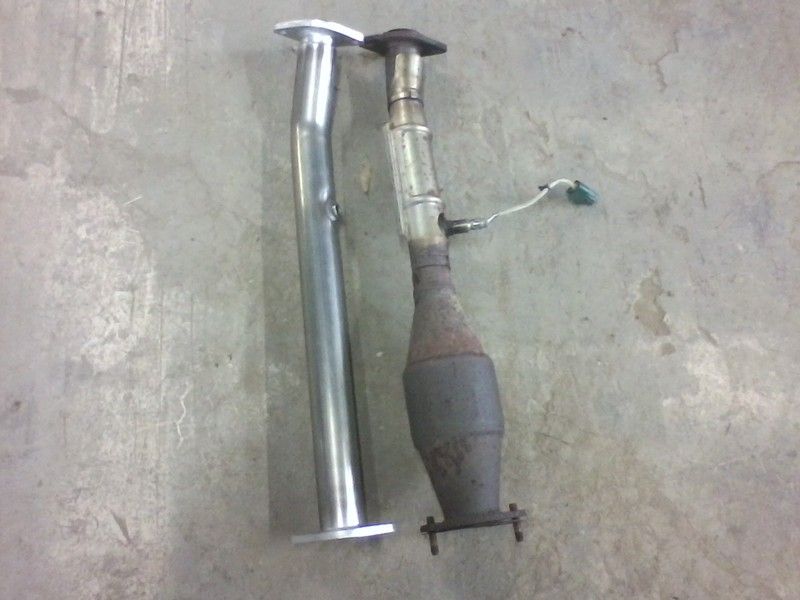
Post converters replaced with Doug Thorley B-pipes:
Overall, with a lift and proper tools, this isn't a bad job. It could be done on the ground, but I would imagine it's a whole lot easier in a shop with a lift and air tools as I was fortunate to have at my disposal. The right side engine mount does not need to be unbolted nor does the engine need to be jacked up...IF...you do not need to save the original manifold heat shield. Removal of the right manifold heat shield was one of the hardest parts of the job! Eventually I found that an Ingersoll-Rand air saw came in very handy as I cut it into sections an removed the shield piece by piece. The insulation creates a lot of dust inside the shield, so you may want to wear a dust mask if you are health conscious. Most of the heat shield bolts will break off, which is not a big idea if you have no plans for the original manifolds other than the trash can. Unbolting the brake line bracket on the frame will give a little play in the brake lines and make the job easier. I would recommend new fenderwell clips as they often break trying to get them out; you'll need about 8-10 of them and you can buy them in bags from Ebay really cheap; it's always good to have a few spares! I also lube the new hardware with copper-grease, aka "copperslip." I have a bottle of Loctite C5-A Copper-based anti-seize which works great in this application and many others, including on brake pad hardware. I did have one issue with the headers: the recess in the flange where the exhaust "O" gasket seats is not as deep as the one on the original exhaust manifold. While bolting the headers to the catalytic converters, it crushed the "O" gasket unevenly and even bent the converter flange. When I noticed the gap, I sealed off the manifold and converter and air tested it to find out it was leaking. I took it apart and replaced the new gasket, which was ruined, with the old gasket coated with Ultra-copper RTV. This was on the right side, which has the original converter with 150,000 miles on it; the left side was replaced at 85000 miles. When I did the left side, I used the original gasket with RTV and it did fit better. All was well until several weeks later; currently, I keep triggering a P0420 catalyst efficiency code for the right-front converter. I'm not sure if it's coincidental that the converter is now failing not long after the header install, or if there is a leak at the gasket. I'll have to look into this. I'll also notify Doug Thorley about it.
The left side was the easier of the two sides, which seams odd because of the steering shaft being in the way on the left side. Someone threw me a cookie in that they cut the heat shield when replacing the left converter, which may have made shield removal a little easier. Whereas the right shield had to go through the wheelwell opening, the left shield could be maneuvered up to the top of the engine compartment. With the shields out of the way, it's really not to bad to get to the manifold nuts; the hardest ones are at the front of the manifold. With the B-pipes/post converters removed, the manifold/catalytic converter assy. pulls out through the bottom. Swap over the headers and re-install. Torque the manifold nut to 22 ft/lbs in proper sequence and install the post converters. In my case, I replaced the post converters with the Doug Thorley mid-pipes. Start the engine and let it run for 20 minutes, then re-torque the header nuts to 22 ft/lbs, again. Reassembly and drive! It is a little louder and I would imagine the removal of the post cats have more to do with the noise than the headers. And while I hate using the "butt dyno" reference, it does "feel" like it has better mid-range power. Obviously, without having access to a dyno for comparison, this is only speculation and/or opinion on my part. You will definitely notice a difference in noise level between what I've done (in combination with the Magnaflow muffler) and the stock system, for better or worse, depending on one's point of view. As I mentioned earlier in the thread, if you prefer a nice, fairly quiet Pathfinder as it comes from the factory, you will not want to do this! It is not obnoxious, but it is noticeable, especially from inside the vehicle.
Remove the wheelwell liner:

View with right liner removed:

Remove brake line bracket:

IR air saw worth weight in gold for this job!:

Bend, cut, remove right shield through wheelwell opening:


Right header installed:

Gap due to poor fit of gasket to new header. Doug Thorley needs to work on this! Maybe an old-style, three-hole, Nissan flange gasket might work better?:


Old gasket used with Ultra-copper RTV:

Right side installed:

Gaskets, new bolts, Loctite C5-A, Ultra-copper RTV:

Left side with liner removed:

Right shield with a little help from a previous converter replacement:

Left side header installed:

Post converters replaced with Doug Thorley B-pipes:


Find Your Forum!