Installing the AirLift 1000

Anything relating to Wheels, Tires, and Brake options and upgrades...

Moderator: volvite

User avatar
doctahjones
Posts: 844
Joined: Tue Nov 16, 2010 11:08 am
Location: aurora, co

Postby doctahjones » Thu Mar 22, 2012 2:01 pm

cgray wrote:I thought about painting my calipers last week when I installed new front brake pads and rotors. I am still thinking about it now that I know how easy it is to get the parts off. Go for it and save yourself the time of tearing things apart again like I am going to end up doing!

yeeeeaaahhh, the problem is i bought black and now i'm thinking i should have gotten silver instead?

at any rate i just got done with my 'day' work so now it's time to setup the cam and put the airlift in!


User avatar
doctahjones
Posts: 844
Joined: Tue Nov 16, 2010 11:08 am
Location: aurora, co

Postby doctahjones » Fri Mar 23, 2012 9:07 am

here's some pics!

it took me quite awhile because i was trying to do the airlift and paint the calipers at the same time. and then i couldn't find my breaker bar so i had to go buy another one at the store, and then i got the wrong socket when i got the breaker bar so i had to go back -again-. sheesh.

didn't get time to do the fronts, so i'm about to go tackle those.
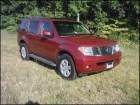


before
Image


cleaned caliper holder
Image


even with jackstands i was very hesitant to get underneath until i put the tires back on
Image


the plastic bags worked well for containing overspray/etc. also read from someone about putting the hose on first on the airbag. i'd have to say that did make it easier. i couldn't imagine trying to do that after the bag was in
Image


definitely had to fold the ends down, then fold it in half to get it in there. after you 'get' it on the first one, putting it in the other bag takes no time at all.
Image


here's where i'm like "eh" on the caliper paint color. which really i used manifold paint because the "500 degree" caliper paint is intermittent not constant. i figure higher temp (1500-2000 degree) paint will hold up better. back to the color: it just doesn't look that much different than the normal "rust" color. i also didn't realize that the manifold paint was flat, i was wanting satin or glossy...
Image


installed on the other side
Image


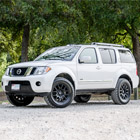
installed and tires back on
Image


So i ran the bags independant, and put the valves on either side of the bumper hitch, on the outside of the fender support. not sure why i left so much extra hose on this side
Image


i think i only used like 2 zip ties on this side, because i spiraled the hose around the trailer wire and such.
Image
Image


the side with the muffler/exhaust was a little harder. i'm concerned about melting the line. i ran it out of the top of the spring, then on the inside of the frame to the top of the wheel well, then back down right behind the wheel well, zip tied it to the clamp on for one of the rear ac hoses, then behind the heatshield for ac, then around the back.
Image
Image


fully inflated before lowering.
Image

User avatar
FLiPMaRC
Posts: 477
Joined: Mon Feb 27, 2012 1:15 pm
Location: NJ

Postby FLiPMaRC » Fri Mar 23, 2012 9:39 am

8) Awesome pics! Thank you!

User avatar
doctahjones
Posts: 844
Joined: Tue Nov 16, 2010 11:08 am
Location: aurora, co

Postby doctahjones » Fri Mar 23, 2012 10:03 am

jeeez. you'd think i'd learn. for some reason i thought the 14mm/17mm caliper bolts that are used for the rear would be used in the front. wrong. 14 and 19mm. and the 3/4in equivalent is too loose on the bolt and i don't want to strip it.

since my car is apart i'm waitin on a buddy to come take me to the damn tool store AGAIN.

and i did have a metric socket set for 1/2, but after tearing the garage apart i can't find it. :/

BattleWagon
Posts: 116
Joined: Mon Jun 27, 2011 9:20 pm

Postby BattleWagon » Fri Mar 23, 2012 1:50 pm

sweet, looks good and I loke the white Pathy.

if you off-road at all I don't think you're gonna like that spot for the valves though, they're gonna drag in the dirt/mud/rocks and get fubar.

User avatar
doctahjones
Posts: 844
Joined: Tue Nov 16, 2010 11:08 am
Location: aurora, co

Postby doctahjones » Fri Mar 23, 2012 2:01 pm

nah, i really don't have any plans for serious offroading. i would like to get it in some mud for fun, maybe try to climb some pathed/easy trails. and if it does get to that point maybe i'd rerun them so they ended up in the jack holder area inside the vehicle :)

funny thing about the white. i still hate it. ok maybe not -hate- so much anymore, but i still don't like it and it's the one thing i really wish i could change. yeah yeah, maaco or whatever but i'm not doing a repaint. i'd lose my "nissian" logo'd pin stripe :P

unfortuantely when i was ready to buy (and didn't have alot of time to wait), the white one was the closest used 4x4 AND v8 to me in dallas that was listed on autotrader, and that was in tyler - a 3 hour drive away! the next closest one was in virgina and there was no way i was driving that far to trade my old acura in!

Tashier
Posts: 1
Joined: Thu May 03, 2012 9:00 am

Postby Tashier » Thu May 03, 2012 9:51 am

Wow, been looking for a solution to my brother's POS pathfinder rear suspension for years and I just hit the jackpot. I'm familiar with these AirLift bags as I've had them on my Tacoma for 12 years and they work perfect still.

Ordering a set of these bad boys today. He's so sick of the bottoming out and any load in the back and it's the worst ride ever. He's got days of driving ahead of him all over the west coast so he will be scrambling to get these in ASAP!!

User avatar
Fookn4x2
Posts: 36
Joined: Thu Feb 10, 2011 11:08 am

Postby Fookn4x2 » Sun May 06, 2012 9:43 am

To me, independent valves seem to be the way to go. Correct me if I'm wrong but when cornering with combined valve, wouldn't air from one bag be forced into the other as one side of the pathfinder dips in the turn? If set up for independent valves then they would both maintain constant equal pressure.

User avatar
smj999smj
Site Admin
Posts: 6060
Joined: Sun Jan 22, 2012 11:13 pm
Location: Prospect, VA

Postby smj999smj » Sun May 06, 2012 9:58 am

Fookn4x2 wrote:To me, independent valves seem to be the way to go. Correct me if I'm wrong but when cornering with combined valve, wouldn't air from one bag be forced into the other as one side of the pathfinder dips in the turn? If set up for independent valves then they would both maintain constant equal pressure.
You're correct. This is very similar to what happened to those that used Hi-jacker air shocks in the '80's to raise the rear on their "hot rods." Under hard turns, the air would shift from one shock to another, so many would run separate air lines to the air shocks.

onzarob
Posts: 1
Joined: Sun Aug 19, 2012 5:46 am

Postby onzarob » Sun Aug 19, 2012 6:01 am

I installed mine last week after towing a 5000lbs travel trailer 2500 km's with the back-end sagging all the way, no adjustment of the weight distribution hitch seem to help.

Read up the guide here and your experiences and bought the airlift 1000. took an hour to install. I dropped the spare out and raised the car on axel stands, didn't even remove the wheels. so very easy for most owners to do.

I haven't towed again yet, well a 100 yards but even without the WD hitch and 10lbs pressure in the bags, less sag ;)

the other improvement is ride quality, the pathy seems to flow over the bumps now and not bottom out and the rear is quieter. A must upgrade, thanks for all who have suggested this upgrade.

oh I did separate lines.

User avatar
Jegan
Posts: 43
Joined: Mon Jan 14, 2013 10:52 am
Location: Terrebonne, QC

Postby Jegan » Sat Apr 06, 2013 5:24 pm

Did my airlifts today. Pretty easy job all around. Hardest part was deciding where to route the tube so it was far enough from the exsaust pipe. Set it up with individual lines and put the two valves on the 7 pin hitch as others have done.

I am going to go and get the trailer in a couple weeks (4000# 23 ft.). The ride quality is already improved by a huge amount. I would recommend these to anyone with a R51 even if they were not going to tow. Great upgrade.

Now I need to find a Bully Dog GT on the cheap. Anyone have a used one?

User avatar
doctahjones
Posts: 844
Joined: Tue Nov 16, 2010 11:08 am
Location: aurora, co

Postby doctahjones » Sun Apr 07, 2013 7:23 pm

Jegan wrote:Now I need to find a Bully Dog GT on the cheap. Anyone have a used one?
got mine off craigs for $2-250...can't remember how much now

Robjunkins
Posts: 6
Joined: Fri Oct 07, 2011 8:39 pm
Location: Mobile, AL

Postby Robjunkins » Sat Apr 13, 2013 8:38 pm

I'm sure the answer is in here somewhere- but can anyone tell me if the bags will work with the rancho 1 1/2" spacers?

User avatar
doctahjones
Posts: 844
Joined: Tue Nov 16, 2010 11:08 am
Location: aurora, co

Postby doctahjones » Sat Apr 13, 2013 8:50 pm

Robjunkins wrote:I'm sure the answer is in here somewhere- but can anyone tell me if the bags will work with the rancho 1 1/2" spacers?
can't imagine why they wouldn't work...especially if you still have the oem springs.

Robjunkins
Posts: 6
Joined: Fri Oct 07, 2011 8:39 pm
Location: Mobile, AL

Postby Robjunkins » Sat Apr 13, 2013 10:11 pm

Well, it's worth a shot. I appreciate your answer- time to order. :D


Return to “R51 Brakes, Tires, and Wheels”