2008 Pathfinder getting the radiator swap
Moderator: volvite
-
08PathPounder

- Posts: 117
- Joined: Wed Dec 17, 2014 3:27 pm
- Location: NJ
2008 Pathfinder getting the radiator swap
Just orderd the spectra premium cu2807 for my pathfinder she only has 48k miles but has the defective part number. It is covered under warranty but I'm doing this as a precaution, I could go without the headache of trans failure and shop bs ect.ect.... Anyone have any tips or tricks on how to make this job go a little more smoothly ? How many gallons of fluid will it hold? And without the purge system what's the easiest way to burp the coolant system without making a mess?? [/img]

One thing I did was order new foam seals from Nissan, which aren't expensive, as they will not come with the aftermarket radiator and the old ones will likely not be in good shape. I used one gallon of long-life anti-freeze mixed with one gallon of distilled water and that's plenty. For me, the hardest part was getting the radiator with the side brackets attached around the A/C metal lines. You'll need to tie-up the A/C condenser to support it during radiator replacement. Also, remove and install the electric fan and the radiator shroud together.
I've been lucky with the purging and never had any issues. First, remember the system is pressurized at the reservoir, not at the radiator cap. Fill the radiator will coolant and install the cap. Fill the reservoir to the "MAX" line. Jack up the front end as much as safely possible. Start the engine, turn on front and rear heaters and set both to the hottest settings. Install the reservoir cap and run the engine at approximately 3000 RPM for 15-20 minutes (it helps to install something between the gas pedal and seat cushion or steering wheel so you don't have to sit there the whole time). Shut the engine off and keep the front end elevated for as long as is practical. Lower and check level; top off as needed. Drive vehicle and make sure your heat is blowing hot air. If not, elevate the front end and repeat process.
I've been lucky with the purging and never had any issues. First, remember the system is pressurized at the reservoir, not at the radiator cap. Fill the radiator will coolant and install the cap. Fill the reservoir to the "MAX" line. Jack up the front end as much as safely possible. Start the engine, turn on front and rear heaters and set both to the hottest settings. Install the reservoir cap and run the engine at approximately 3000 RPM for 15-20 minutes (it helps to install something between the gas pedal and seat cushion or steering wheel so you don't have to sit there the whole time). Shut the engine off and keep the front end elevated for as long as is practical. Lower and check level; top off as needed. Drive vehicle and make sure your heat is blowing hot air. If not, elevate the front end and repeat process.
I did a write up on mine with pictures on here somewhere and I think there are a couple more.
I have an '08 V8 and did it with a $20 tool kit from Walmart (long story). It was relatively straightforward and I did it without removing the fan. The trickiest part was finagling the old radiator out and the new one in without damaging the fins. I would cover the front and back of the new radiator with cardboard during installation so you don't have to be so careful.
I have an '08 V8 and did it with a $20 tool kit from Walmart (long story). It was relatively straightforward and I did it without removing the fan. The trickiest part was finagling the old radiator out and the new one in without damaging the fins. I would cover the front and back of the new radiator with cardboard during installation so you don't have to be so careful.
-
08PathPounder
- Posts: 117
- Joined: Wed Dec 17, 2014 3:27 pm
- Location: NJ
smj999smj wrote:One thing I did was order new foam seals from Nissan, which aren't expensive, as they will not come with the aftermarket radiator and the old ones will likely not be in good shape. I used one gallon of long-life anti-freeze mixed with one gallon of distilled water and that's plenty. For me, the hardest part was getting the radiator with the side brackets attached around the A/C metal lines. You'll need to tie-up the A/C condenser to support it during radiator replacement. Also, remove and install the electric fan and the radiator shroud together.
I've been lucky with the purging and never had any issues. First, remember the system is pressurized at the reservoir, not at the radiator cap. Fill the radiator will coolant and install the cap. Fill the reservoir to the "MAX" line. Jack up the front end as much as safely possible. Start the engine, turn on front and rear heaters and set both to the hottest settings. Install the reservoir cap and run the engine at approximately 3000 RPM for 15-20 minutes (it helps to install something between the gas pedal and seat cushion or steering wheel so you don't have to sit there the whole time). Shut the engine off and keep the front end elevated for as long as is practical. Lower and check level; top off as needed. Drive vehicle and make sure your heat is blowing hot air. If not, elevate the front end and repeat process.
Well that about sums it up, the spectra is on her way here I guess I'll run down to the dealership and get those foam seals... Next after the radiator swap I'm 1/0gaugeing my amplifier cable the ground from chassis to motor and chassis to battery in anticipation of a ridiculous sound system and maybe an led light bar or two
There are two seals on the radiator, itself. There are also two seals, one for each of the side brackets. I replaced those, as well, as I figured they would get torn up during the removal...and they did.
Make sure you don't run the ground to the negative battery cable connection at the battery post. There is a voltage sensor on the negative cable; you'll see it if you follow the negative cable from the battery post to the back side of the battery. You'll want to install your ground cable before that sensor or on the bracket to which the sensor is mounted.
Make sure you don't run the ground to the negative battery cable connection at the battery post. There is a voltage sensor on the negative cable; you'll see it if you follow the negative cable from the battery post to the back side of the battery. You'll want to install your ground cable before that sensor or on the bracket to which the sensor is mounted.
-
08PathPounder
- Posts: 117
- Joined: Wed Dec 17, 2014 3:27 pm
- Location: NJ
Finally catching a break in the weather after this winter we just had. Going to go get those seals that were mentioned above and have at it. Probably will be doing it this Saturday or Sunday depending on work/weather. Just gave my girl her first oil change with Royal Purple 5w30 after putting the first 6k on since I have owned it. I can't wait to get the radiator done and have peace of mind.
Plan on having to order the seals. I doubt that they'll stock them. Or, order them from 1stAAANissanPartsZone.com08PathPounder wrote:Finally catching a break in the weather after this winter we just had. Going to go get those seals that were mentioned above and have at it. Probably will be doing it this Saturday or Sunday depending on work/weather. Just gave my girl her first oil change with Royal Purple 5w30 after putting the first 6k on since I have owned it. I can't wait to get the radiator done and have peace of mind.
-
08PathPounder
- Posts: 117
- Joined: Wed Dec 17, 2014 3:27 pm
- Location: NJ
Alright,
So I finally got a county job working 4 10 hour days and have the time to do this. My pathy is about to hit 58k and I'm getting nervous when I think about the contamination. Today's the day. I'm replacing the rad with a spectra premium I purchased online a few months ago. Just went and got a gal of Prestone and a gal of distilled water from my local Walmart. I'll do the 50/50 mix my self for 8 less dollars than what it would have cost to do buy the 50/50 premix (10 a gallon). Any ways I'll try and take pictures along the way, but have to wait for the temp to come down before I can start this morning. Hopefully will be done in about 2 hours or so without any f ups.
So I finally got a county job working 4 10 hour days and have the time to do this. My pathy is about to hit 58k and I'm getting nervous when I think about the contamination. Today's the day. I'm replacing the rad with a spectra premium I purchased online a few months ago. Just went and got a gal of Prestone and a gal of distilled water from my local Walmart. I'll do the 50/50 mix my self for 8 less dollars than what it would have cost to do buy the 50/50 premix (10 a gallon). Any ways I'll try and take pictures along the way, but have to wait for the temp to come down before I can start this morning. Hopefully will be done in about 2 hours or so without any f ups.
-
08PathPounder
- Posts: 117
- Joined: Wed Dec 17, 2014 3:27 pm
- Location: NJ
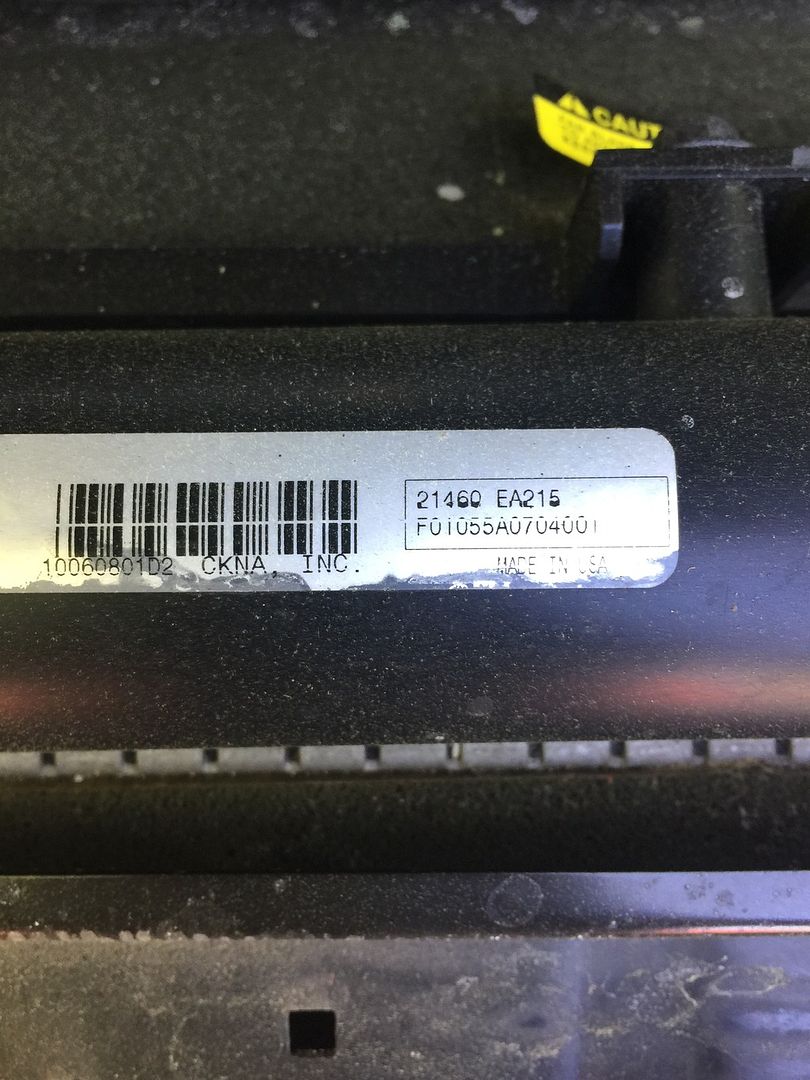
As you can see I have the defective part # on my 2008 S
I started by taking the intake tube off and setting that aside as well as removing the intake "cap" and just turning it out of the way for now.
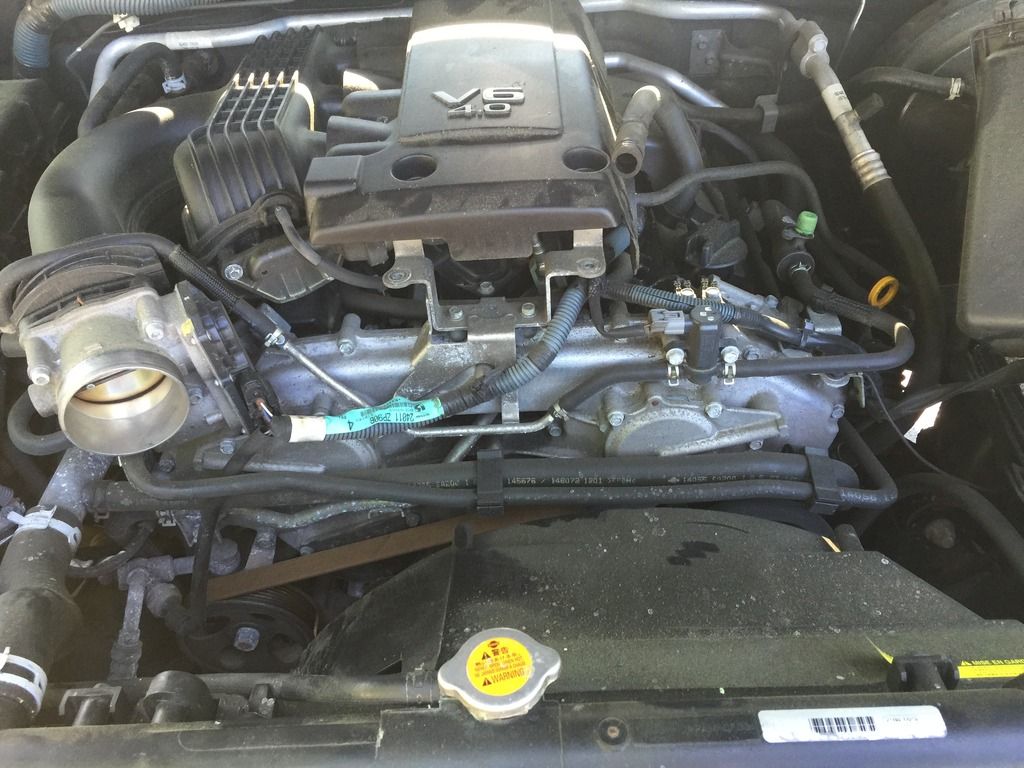
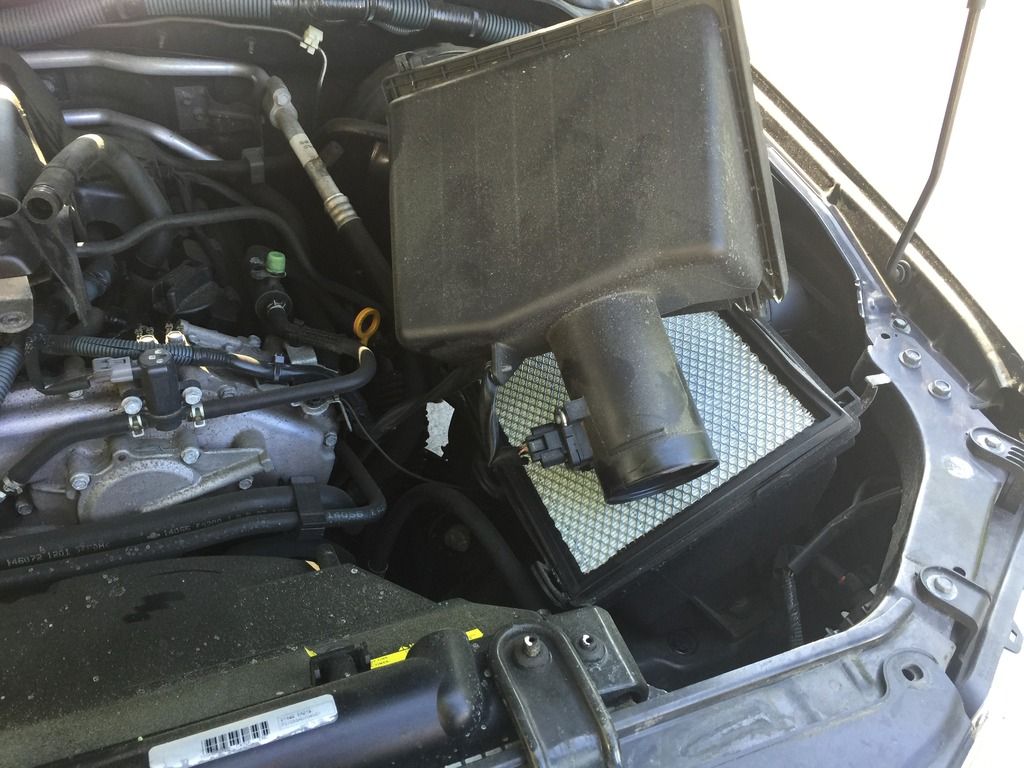
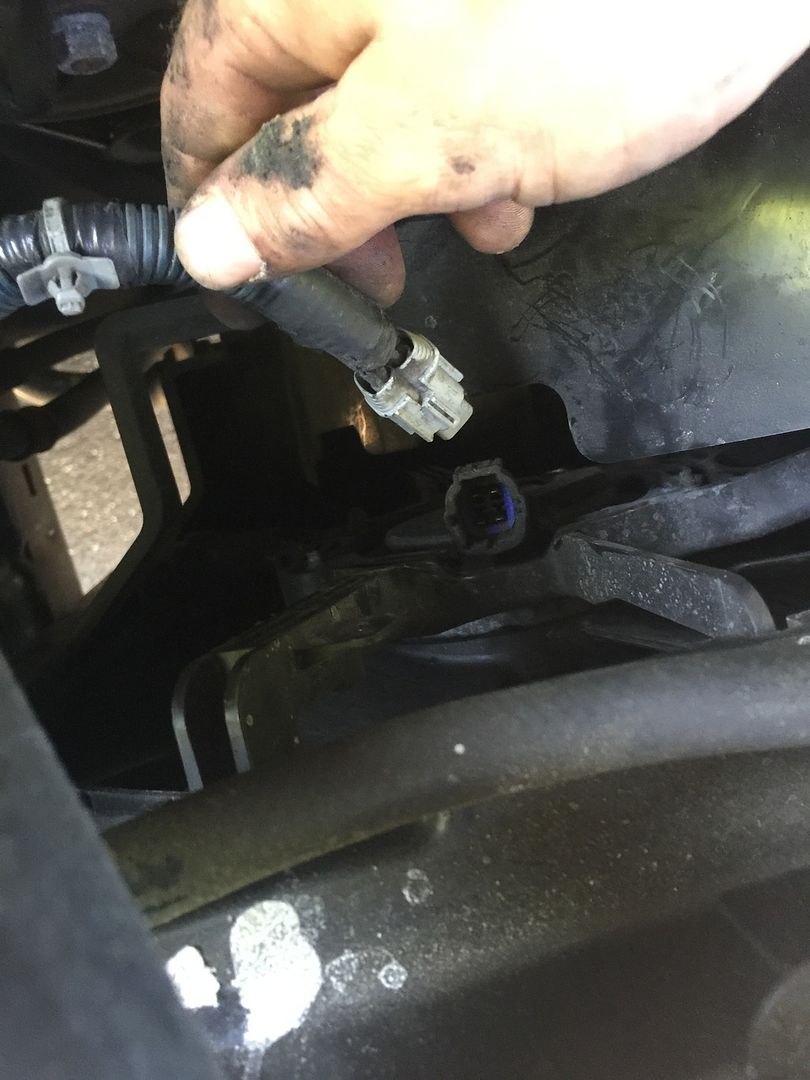
Next I disconnected ( carefully) the electrical fan and & un-clipped the cheap plastic tabs that hold the wires in place. I did so by squeezing the backside of the tabs allowing the clip to pass through the hole.
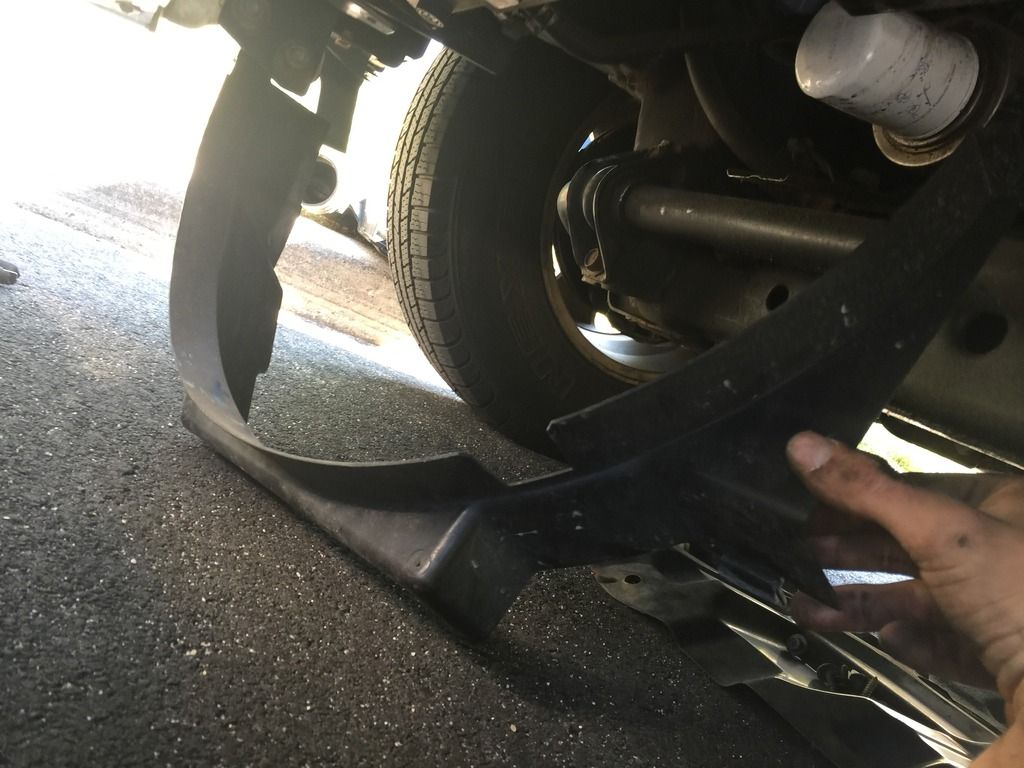
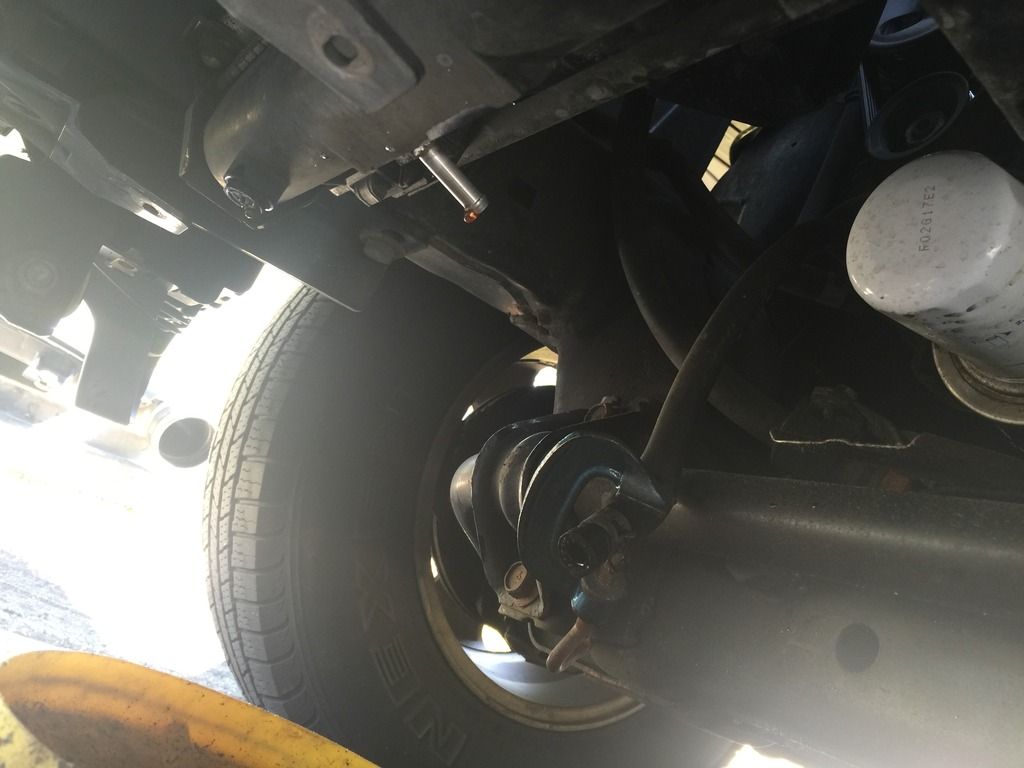
After this I went underneath the car and removed my skid plate which was just some 10 mm bolts. That exposed the bottom of the fan shroud allowing me to simply unclip the bottom plastic piece which was held in by 2 clips and remove that out of the way. This exposes basically everything you will need to get too.
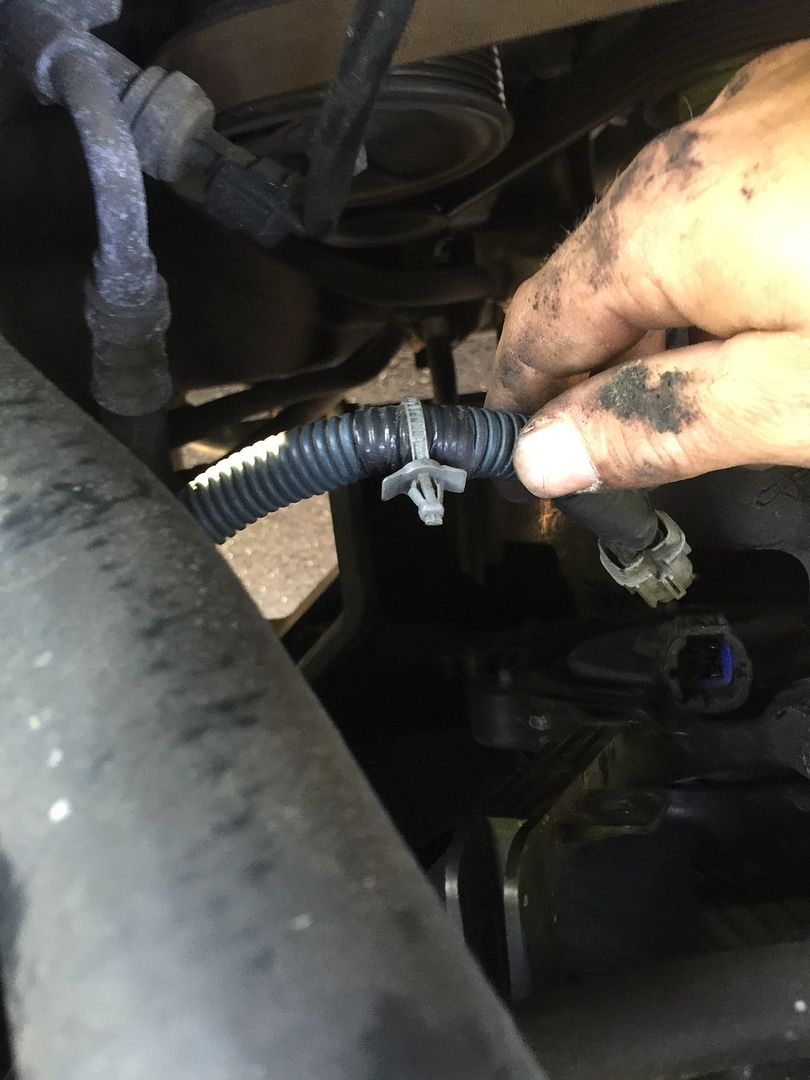
There are two trans cooling lines on either side that are just slipped into these semi circle clips, I simply pulled them out and let them hang out until the engine temp went down enough to where I could drain the fluid and let the REAL fun to begin.

I started by taking the intake tube off and setting that aside as well as removing the intake "cap" and just turning it out of the way for now.


Next I disconnected ( carefully) the electrical fan and & un-clipped the cheap plastic tabs that hold the wires in place. I did so by squeezing the backside of the tabs allowing the clip to pass through the hole.


After this I went underneath the car and removed my skid plate which was just some 10 mm bolts. That exposed the bottom of the fan shroud allowing me to simply unclip the bottom plastic piece which was held in by 2 clips and remove that out of the way. This exposes basically everything you will need to get too.

There are two trans cooling lines on either side that are just slipped into these semi circle clips, I simply pulled them out and let them hang out until the engine temp went down enough to where I could drain the fluid and let the REAL fun to begin.

-
08PathPounder
- Posts: 117
- Joined: Wed Dec 17, 2014 3:27 pm
- Location: NJ
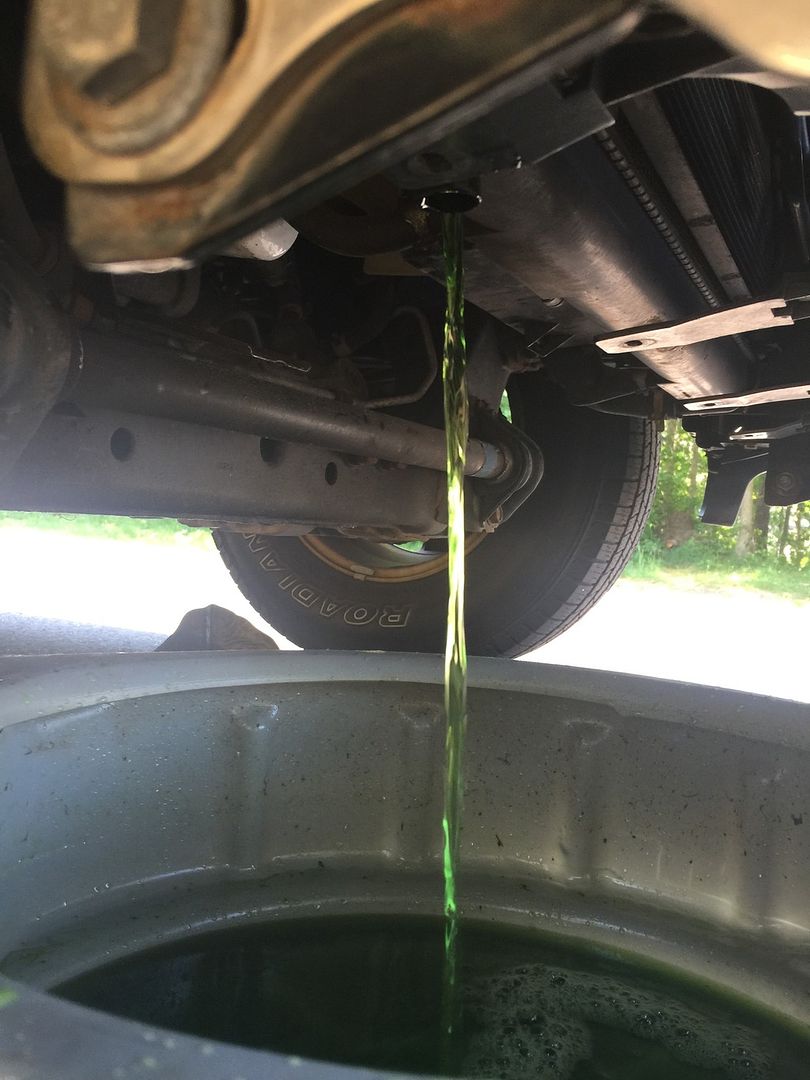
Okay so after about 30 min I drained the fluid from the Phillips head drain plug, I also pulled both the transmission coolant lines and clamped them shut with "c" clamps to prevent a mess. I added a drain pan to catch the drips and drops coming from them initially.
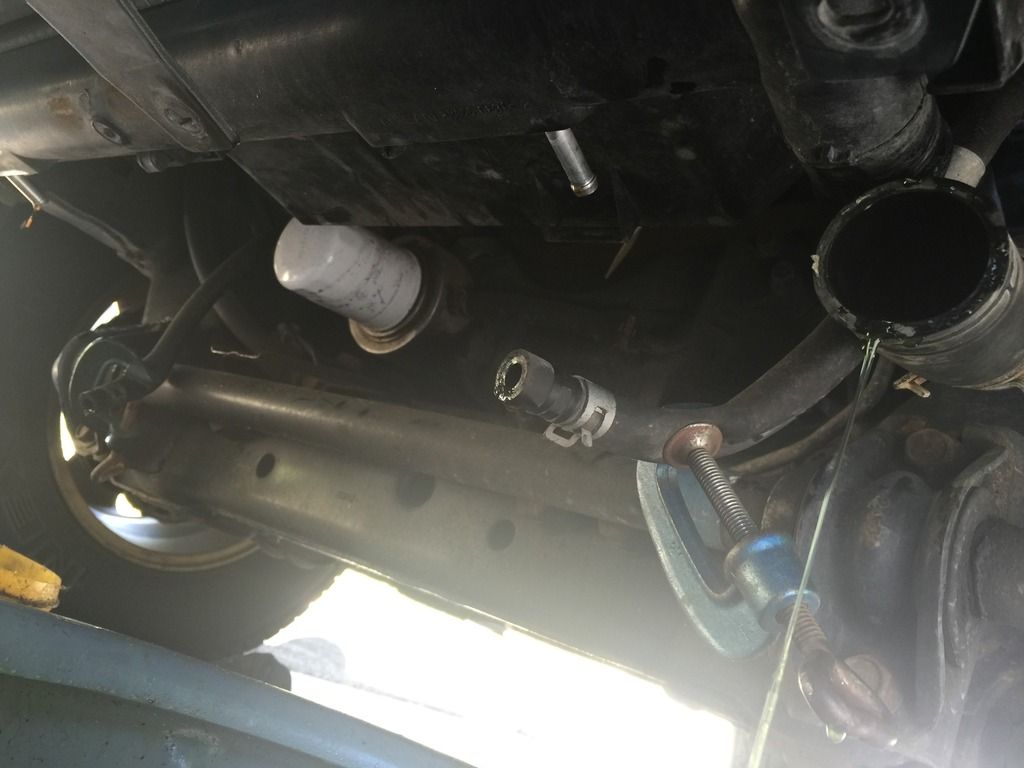
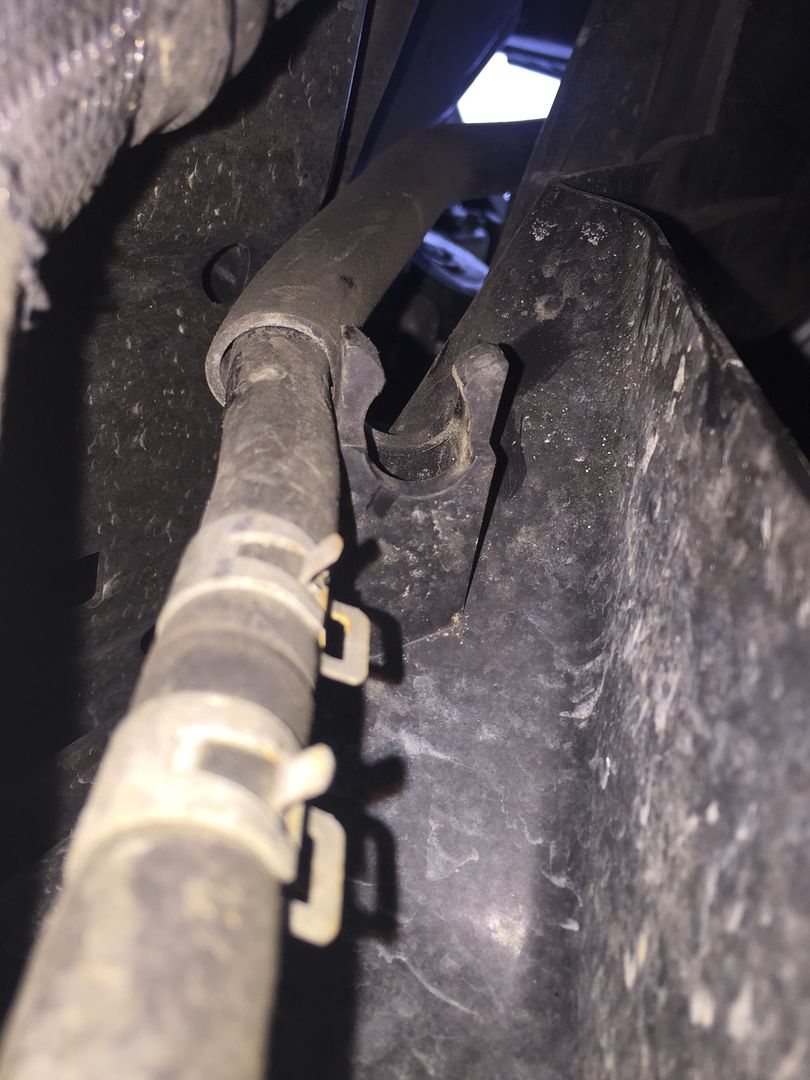
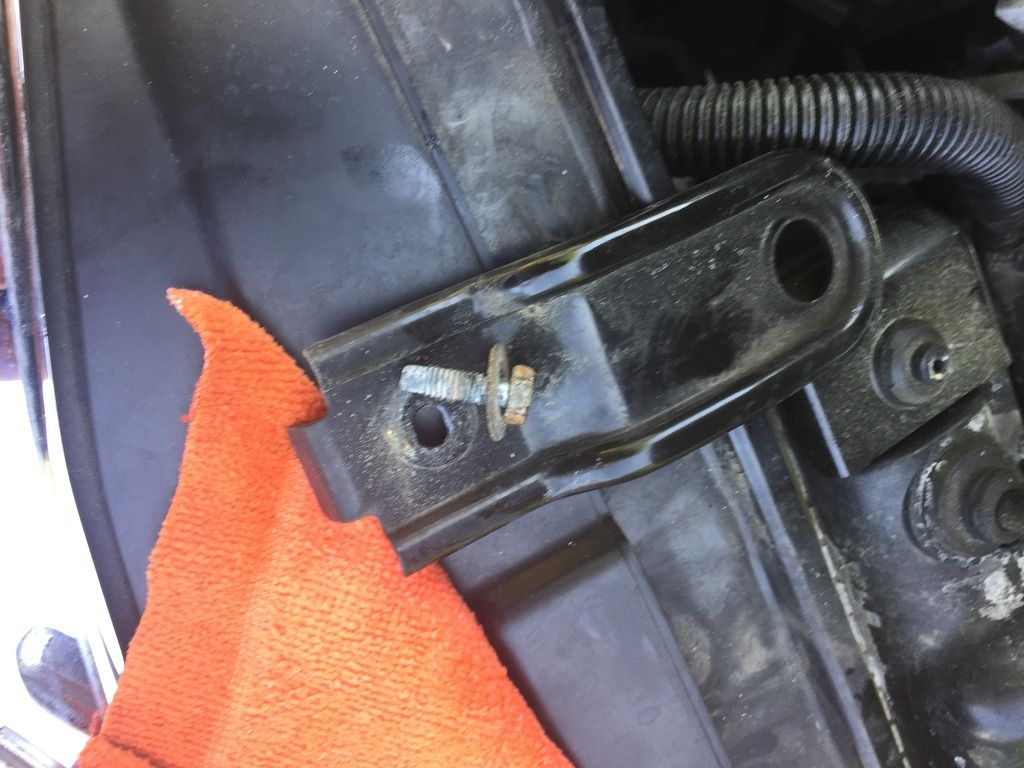
There is a little "manipulation" involved in getting the 10mm bracket bolts off. I had to hold back the plastic with one hand and turn a wrench with the other
Next I pulled off the bottom piece of the shroud exposing some more of the electrical fan and clutch fan and to bunggied the condenser that's attached to the radiator with 2 10mm bolts to support it while I wrestled the shroud & radiator out.

If your not careful it WILL crack. I got lucky. And with a bit of an ass kicking got it out. There is really no easy way to do this if you ask my its all about patience and if you need too walk away for a minute lol....NOTE: that when replacing the new Rad I put the radiator in, than the fan, then the shroud, as oppose to wrestling the whole thing in at once.
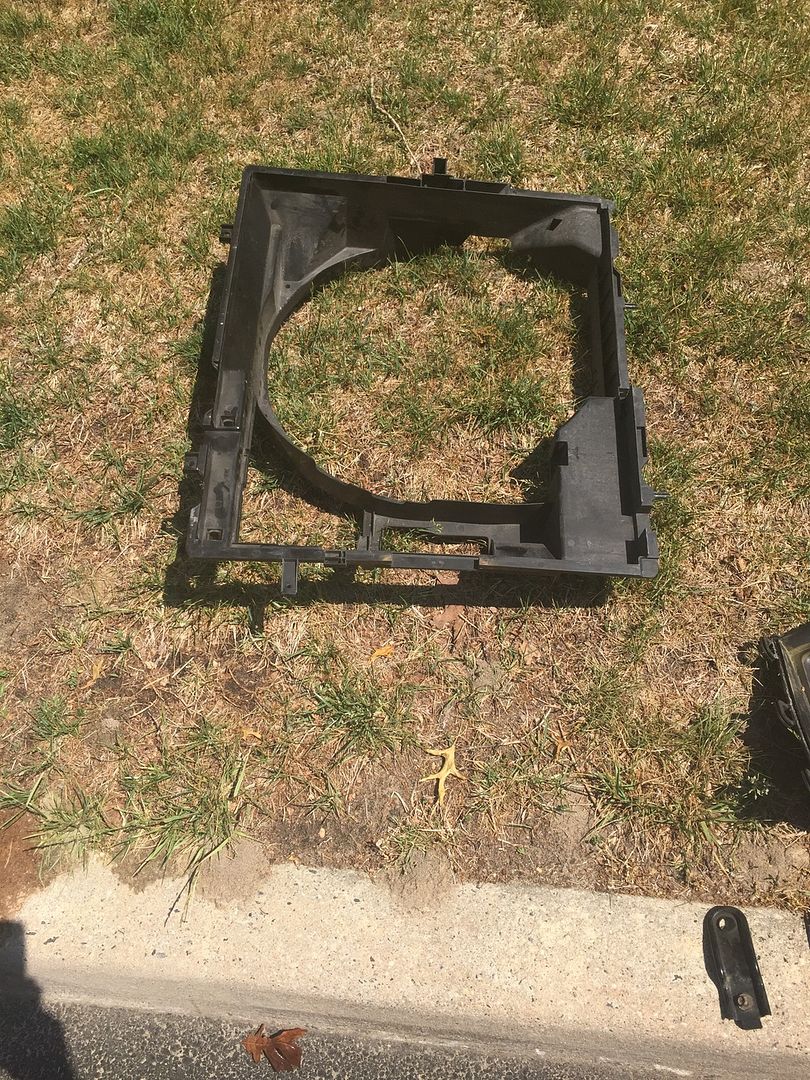
Once the shroud is removed it leaves you with plenty of room to get the old out and the new in just be careful to not bang the new one around so much those cooling fins are incredibly sensitive
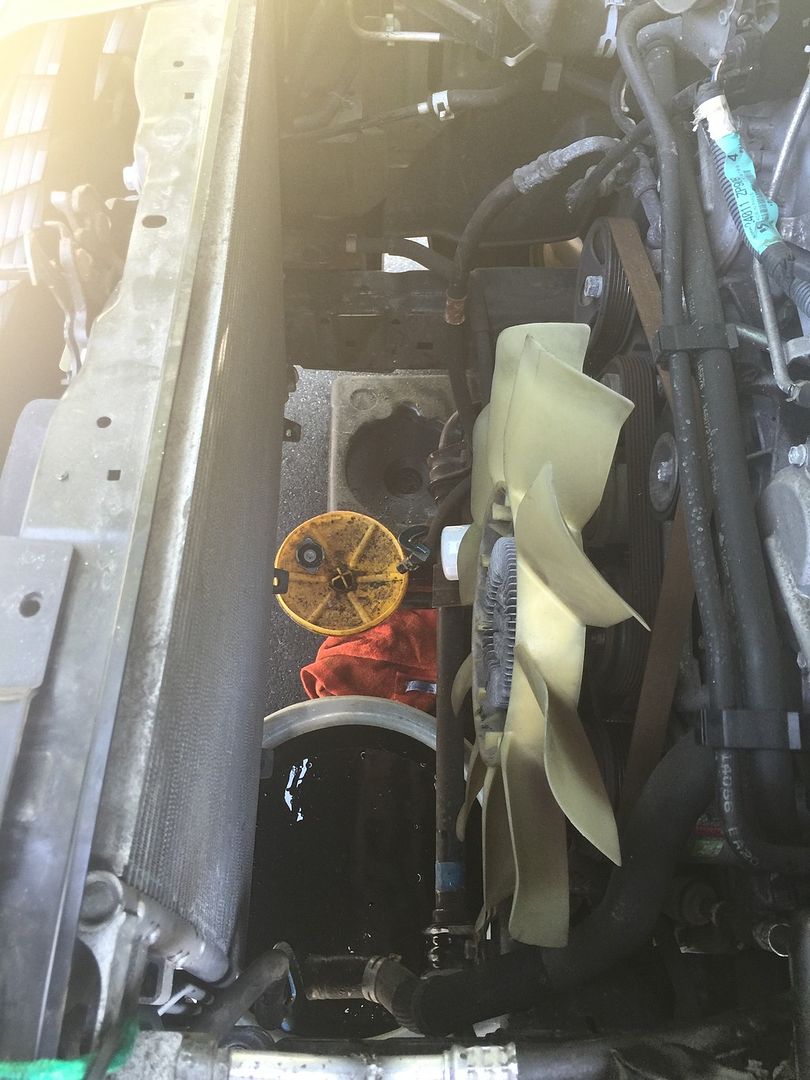
Take a look around make sure all your bolts are still there and then begin to reverse the process starting with the radiator, than the electric fan, than the shroud, plum it up and purge the system as stated previously in this thread. I filled the rad and resivor with 1.75 gallon of fluid. I jacked up the front end and fired it up running it at 2500 for about 2 minutes or so, with the heat on full blast. After this I let it idle after while I put the resivor cap on and brought it back up to 2500 again. My heat worked almost instantly after doing this. I lowered the front end took it for a spin and checked for leaks. Everything is good to go so far.
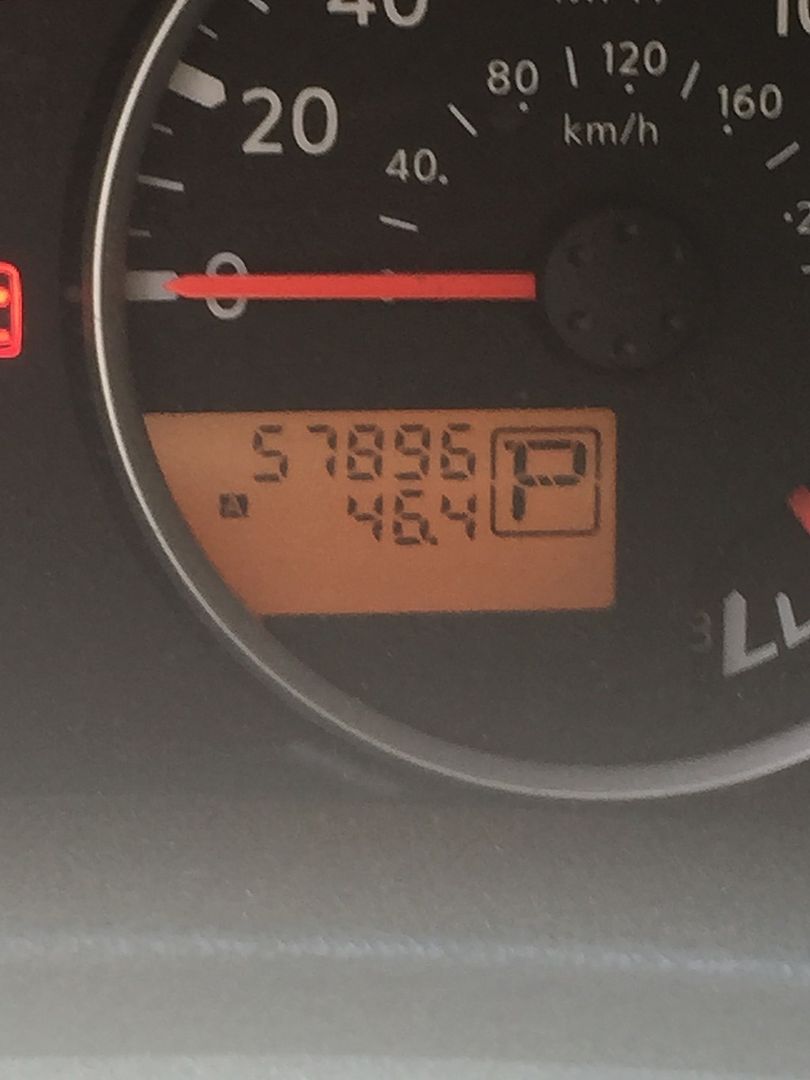
She's almost at 58k now so fingers crossed this will last the life of the vehicle.
Hope this helped feel free to ask questions and good luck!


There is a little "manipulation" involved in getting the 10mm bracket bolts off. I had to hold back the plastic with one hand and turn a wrench with the other

Next I pulled off the bottom piece of the shroud exposing some more of the electrical fan and clutch fan and to bunggied the condenser that's attached to the radiator with 2 10mm bolts to support it while I wrestled the shroud & radiator out.

If your not careful it WILL crack. I got lucky. And with a bit of an ass kicking got it out. There is really no easy way to do this if you ask my its all about patience and if you need too walk away for a minute lol....NOTE: that when replacing the new Rad I put the radiator in, than the fan, then the shroud, as oppose to wrestling the whole thing in at once.

Once the shroud is removed it leaves you with plenty of room to get the old out and the new in just be careful to not bang the new one around so much those cooling fins are incredibly sensitive

Take a look around make sure all your bolts are still there and then begin to reverse the process starting with the radiator, than the electric fan, than the shroud, plum it up and purge the system as stated previously in this thread. I filled the rad and resivor with 1.75 gallon of fluid. I jacked up the front end and fired it up running it at 2500 for about 2 minutes or so, with the heat on full blast. After this I let it idle after while I put the resivor cap on and brought it back up to 2500 again. My heat worked almost instantly after doing this. I lowered the front end took it for a spin and checked for leaks. Everything is good to go so far.

She's almost at 58k now so fingers crossed this will last the life of the vehicle.
Hope this helped feel free to ask questions and good luck!
How do you know which radiator is defective in 2006 year?
I bought a used 2006 this year. How do I determine if my radiator is one that could potentially fail? Is there a Data Base to look up the defective number?
Most will usually have a Calsonic label with P/N:21460-EA215 or -EA265. They P/N: 21460-9CA2E superceded those numbers, but it seems somewhere in that P/N range the issue was resolved...although there have been reported failures with some of the -9CA2E models, so those radiators are in question, as well, depending on when they were manufactured. There is no database released by Nissan. Nissan still claims it's only a small number that are affected by the issue. 

-
08PathPounder
- Posts: 117
- Joined: Wed Dec 17, 2014 3:27 pm
- Location: NJ
Re: How do you know which radiator is defective in 2006 year
mrjfk65 wrote:I bought a used 2006 this year. How do I determine if my radiator is one that could potentially fail? Is there a Data Base to look up the defective number?
Mrjfk65, Smj knows what's up and nailed it. He's helped many on this site out countless times. My self included.
Thank you flip , I'm sure people see different ways to do things than I did but it worked for me and so far so good no problems to speak of after a few thousand miles.FLiPMaRC wrote:Nice write up & pics 08PathPounder
(knock on wood) I had to add some more coolant than previously stated after driving it around it took just over 2 gallons total.
-
08PathPounder
- Posts: 117
- Joined: Wed Dec 17, 2014 3:27 pm
- Location: NJ
5,000 miles and he f*cking thing is leaking coolant!!!!!!! I'm heated. But that won't solve sh*t now will it? Get out of the car and sure as shit I can smell that sweet smell. So I pop the hood and get to snooping. I then see the damn thing is leaking from the top rubber seal that goes the width of the radiator!! I ordered the Spectra Premium CU2807 from Partsgurus.com less 10 months ago when I bought my pathy.. Waited 10,000 miles and for some sunny weather to put it in. As documented here everything went well I have full blast heat. WTF over.
Now what do I do???? I have the order confirmation emails... And the stock rad sitting in the box that the spectra came in, in my attic. But no receipt obviously. I'm pissed as hell as it was basically a complete waist of money at this point. Went from internal leak with the stock to the external leak with the spectra. Will be atleast a month before I can get the scratch for a new replacement... Any suggestions???
Now what do I do???? I have the order confirmation emails... And the stock rad sitting in the box that the spectra came in, in my attic. But no receipt obviously. I'm pissed as hell as it was basically a complete waist of money at this point. Went from internal leak with the stock to the external leak with the spectra. Will be atleast a month before I can get the scratch for a new replacement... Any suggestions???

Find Your Forum!