
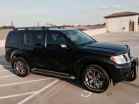
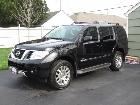
I wanted to change out my OEM speakers for something a bit better on my 2011 Pathfinder SV. I looked all over the internet and could not find any really good posts on this subject so I thought I’d put mine out there for everyone to see and maybe it will help someone else to do the same of something similar. My Pathfinder has a 6 CD changer Stereo with 6 speakers that is considered base.
My first step was to take off the door panels and look at what the factory had blessed me with. It turns out that the front speakers are 6x9’s and are rated for 20W but only 2 OHM’s. This is significant since resistance plays a role in how much power is put out. For instance, if your stereo or amplifier puts out 50W per channel (speaker) if the speaker is rated at 4 OHM’s that is what you will get as you final output, 50W; however, if your speakers only have a 2 OHM rating then your output doubles to 100W. So I had to find speaker with a 2 OHM rating since that would match the current system. If you plan on putting in 4OHM’s then you would be reducing your power but it would still work. The end result would be that you would need to turn your volume up twice as high as normal to get the sound you want but since the OEM Stereo is most likely putting out less than the 20W rated speakers you would probably want to conserve all the power you can.
The rear doors have 6.5” speakers that are also rated at 20W and 2 OHM’s but the tweeters in the dash were rated at 4 OHM’s and had no indication of output levels.
So I found and bought some nice but inexpensive JBL speakers to replace the lot. For the front door I chose JBL’s GTO series 938 3-way coaxial speakers (rated at RMS 100W) and the rear doors got the JBL GTO series 628 2-way coaxial speakers (rated at RMS 65W). For the tweeters I chose the JBL GTO series 10t (rated to take anywhere from 5 – 150W) and the total price was $125 for all six through Amazon.com.
JBL GTO 938 6x9's:http://www.amazon.com/JBL-GTO938-9-Inch ... eakers+6x9
JBL GTO 628 6.5's: http://www.amazon.com/JBL-GTO628-6-5-In ... eakers+6.5
JBL GTO 10t Tweeters: http://www.amazon.com/JBL-GT010T-1-COMP ... l+tweeters
At this stage I would like to let you know what the difference is between coaxial and component speakers since this does play a role in the Pathfinder. A coaxial speaker is simply one speaker with the woofer and tweeters built as one unit and they can range from 1 to as many as 5 tweeters. A audio professional told me that this is extreme over kill since the industry’s philosophy is “more is better”, but your 2-way or 3-way speakers are really all you need. On the other hand, the component speakers have the woofer and tweeters separate to be installed in different locations. This is significant in the Pathfinder since the door speakers and the tweeters are wired as a component speaker setup. So what does that mean? Well you can really install any 6x9 speaker you want in the front doors but where the tweeters go you will need to install the crossover component that most tweeters already come with. Some tweeters will come with the capacitor (crossover component) already attached to it so no extra wiring is needed but others come separate and you may have to do some wiring.
The next thing you should be aware of is that the speaker’s connectors on the speakers are proprietary as well as the speakers themselves. This means you will have to cut the connectors off and wire in speaker connectors yourself since for my model year there is no one that makes adapters. Not even “Crutchfield” who is famous for providing those for free. Beware that some folks will try to sell you adapters for this model year but they will not fit since they are based on previous generations of Pathfinders. Your standard connectors are a 1/8” for the negative and 3/16” for the positive connections on the speaker itself. Just go with a set of crimp-on’s that you can buy at Radio Shack. When connecting the factory wires you will find that they come in all kinds of different colors. The rear door wires match in color and all you need to make sure is that whatever color you chose for positive you replicate on the other side as well. The tweeter wires are red and black and match the tweeter wire colors. You can also remember that red is for positive and black is for negative. I was able to reuse the tweeter connectors since they were not mounted to the speaker itself like you will find in the doors.
The rear door speakers are very unique since the speaker and the door mount are one unit and you cannot use the factory door mount for your new install. Here I found a set on Amazon.com ($17) that will mount on the door and allow you to install any 6.5” speaker to it ( http://www.amazon.com/Nissan-Infiniti-P ... rs+for+6.5 ). The only tricky part here is to have enough distance from the window and the inside of the door so that it doesn’t interfere with the speaker when you roll down the window. The factory setup is 32mm thick and the replacements were only 27mm but this was enough to avoid the problem mentioned above. I also had to reroute the wires to get them to extend far enough to use them for my new speaker so when you cut off the factory connector do it as close as possible to the connector to maximize the length of the wire. I also had to drill a hole through the new mount to allow for the wires to pass through. I just had enough wire to make it work so be careful. The rear doors require a bit of modification as you can tell but the overall job here is easy.
What was even easier were the front doors. Here you can use the factory mounts with any kind of 6x9 speakers you want. I had to cut away a small portion of a flap inside the door since most good speakers will have triple the size of a magnet in the back over any factory speaker. This is real easy done by taking the mount off and cutting away as much as you need so that the speaker doesn’t rub-up against it when you install it. Here you have to cut off the connectors as well but you have plenty of factory wire left to reach your new speaker.
The tweeters are a bit more involved. Here the speaker is integrated into a metal mount that is square and screwed down by three screws. Two of the screws are easy to get to but the third is tough. The smallest ratchet in the world won’t fit between it and the windshield. So I had to use a 7mm key to work it one half turn at a time. It took a little while but it was all good in the end. Be careful not to drop the factory wire back into the hole you may have to go on a fishing expedition if you do. The wire there is very short and will only extend out far enough for you to disconnect the tweeter. I used a pair of surgical clamps that lock in place and held the wire and connector in place. Here I had to make my own mount. I used a piece of sheet metal that I cut to the dimensions of the tweeters square. I then used my grinder to soften the edges and round off the corners. I then placed the old tweeter on top and marked all four screw holes even though there are only three screws holding it in place but this allowed me to rotate the mount any way I wanted. The hard part here was making the 1 and 9/16 hole for the new tweeter. I had to get a special drill bit that cost me $17 to make a 1 and ½ inch hole (which I will most likely never use again) and then grind it out with my drill to make the tweeter fit. But in the end it was all good and I placed the tweeter with its crossover into its hole and put it all back together.
The new speakers are definitely a great improvement over the factory ones. The factory speakers were really cheap and made of paper with a cone in the middle. Even the tweeters were made of paper. Of course the new ones are of much better quality and I can hear the difference. The sound is much crisper and the bass deeper. Even at lower volume levels the difference is noticeable. All in all a good trade off. I did not install an amplifier because I don’t see the need for loud music just better sounding one.
I hope this write up will help someone out there to make better decisions on how to go about replacing their speakers or even entice someone to just do the same I did. I think you would enjoy it just the way I am. So good luck and many thanks for indulging me in reading all of this.
Project Stereo Speaker Swap in a 2011 SV
Moderator: volvite
Project Stereo Speaker Swap in a 2011 SV
Last edited by hfrez on Fri Jan 03, 2014 10:10 am, edited 5 times in total.

Nice job with the details! Question for you: your head unit was connected directly to the speakers, as in no sub & no factory amp (like on mine)? I'm probably going to install a new head unit, then see how I like it with the stock speakers. I totally hate paper cones, but I guess I'm at the age where I just don't care. If I were still in my teens, the first thing I would have done is rip out all of the factory crap on day one. I figured the tweeters would be somewhat of a bitch, so I'm glad you got them to work.

Excellant write up
I really hope to do this soon. What were the Nissan factory speakers like? and was there a big audio quality difference?
Do you plan on any additional work in the future like adding subs? I am just curious. In my previous car, a jeep I was going to go the sub route but I was convinced to just replace the factory speakers with something different. I was very glad I did and never thought about adding a sub after the speaker upgrade.
Do you plan on any additional work in the future like adding subs? I am just curious. In my previous car, a jeep I was going to go the sub route but I was convinced to just replace the factory speakers with something different. I was very glad I did and never thought about adding a sub after the speaker upgrade.
-
hazmat1121
- Posts: 3
- Joined: Wed Apr 16, 2014 10:39 am
Bose System
Out of curiosity was this a Bose system? I am looking to replace the speakers in my 2008 Pathfinder LE with the Bose system but I can't find any information about the speakers already in there. I would like to know before I tear the doors apart so I only have to do it once. Thanks!
-
AtlantaRuffian
- Posts: 49
- Joined: Wed May 14, 2014 4:12 pm
- Location: Boca Raton, FL
Tweeter Mount
Any chance you remember what size the screw holes on the corners of the tweeter mount plate are? I'f going to fabricate a mount as you did with Lexan and am considering using push pin plastic retainer clips to replace the screws to make for an easier placement and removal because, as you said, it's pretty cramped near the windshield.
-
doctahjones

- Posts: 844
- Joined: Tue Nov 16, 2010 11:08 am
- Location: aurora, co
Re: Bose System
you'll need to find 1ohm speakers for the bose setup, since it goes headunit -> bose "amp" -> speaker.hazmat1121 wrote:Out of curiosity was this a Bose system? I am looking to replace the speakers in my 2008 Pathfinder LE with the Bose system but I can't find any information about the speakers already in there. I would like to know before I tear the doors apart so I only have to do it once. Thanks!
-
drjdog5150
- Posts: 8
- Joined: Mon Feb 17, 2014 5:18 pm
- Location: Tucson, AZ
-
Zen_master
- Posts: 276
- Joined: Fri Apr 12, 2013 7:42 pm
Re: Bose System
If I replace the amp am I good to go with a different impedance setting?doctahjones wrote:you'll need to find 1ohm speakers for the bose setup, since it goes headunit -> bose "amp" -> speaker.hazmat1121 wrote:Out of curiosity was this a Bose system? I am looking to replace the speakers in my 2008 Pathfinder LE with the Bose system but I can't find any information about the speakers already in there. I would like to know before I tear the doors apart so I only have to do it once. Thanks!
-
doctahjones
- Posts: 844
- Joined: Tue Nov 16, 2010 11:08 am
- Location: aurora, co
Re: Bose System
well, yes/no.....Zen_master wrote:If I replace the amp am I good to go with a different impedance setting?doctahjones wrote:you'll need to find 1ohm speakers for the bose setup, since it goes headunit -> bose "amp" -> speaker.hazmat1121 wrote:Out of curiosity was this a Bose system? I am looking to replace the speakers in my 2008 Pathfinder LE with the Bose system but I can't find any information about the speakers already in there. I would like to know before I tear the doors apart so I only have to do it once. Thanks!
the "best" way would be to figure out the pin out from the radio to the stock "amp", so that you can reroute it to the aftermarket amp at line level.
however i'm not sure that would work right, so what you'd have to do is go radio -> stock "amp" -> aftermarket amp -> speaker. now you'll either need an aftermarket amp with speaker (high) level inputs, or you'll need a "line level converter" which converts speaker level power down to the lower "line" level power that most amps require as an input.
the way i wired in my subwoofer amp, was to splice off of the stock(bose) sub, after the amp back there. I did try to figure it out from the input side, but since they use "car" colors for the wires and i couldn't find a wiring diagram to explain the colors, i just took it from the output/speaker/high level side and used a converter before feeding into my amp.

Find Your Forum!